Clips is the Apple application that allows you to create and edit videos that you can then share on any social network or messaging application. The tool is really spectacular and we all agree that it is an application with great potential.
However, there is something that can work against it to become a reference in the creation of social video, many users call it confused and unresponsive to create quick videos. It is true that when you face Clips for the first time you realize that it is not as intuitive as it should be, although it really is a somewhat different concept from what we are used to and perhaps for this reason we see it as unfriendly.
In this article we are going to try to clarify how Clips works as well as discover a few tricks that you can use to create impressive videos in a few seconds.
[Toc]
How does Clip work? basic fundamentals
As its name indicates, this application is based on composing videos with different shots (Clips), to which we can apply effects.
The big red button that you will see on the screen when you start a new Clips video is the most important of the entire application, since it is the one that will determine how long each clip you add to your final montage lasts.
It does not matter if what you are going to add is a video or a photo that you take from the application itself or that you upload it from your iPhone library, what you add has to last for a while that will be the same as you have pressed that button.
Right next to the red button you will see the sound button. default is always on and it will record the ambient sound when you touch the red button. If you do not want everything you say to be recorded while you press the button to add Clips, touch the sound button to deactivate it.
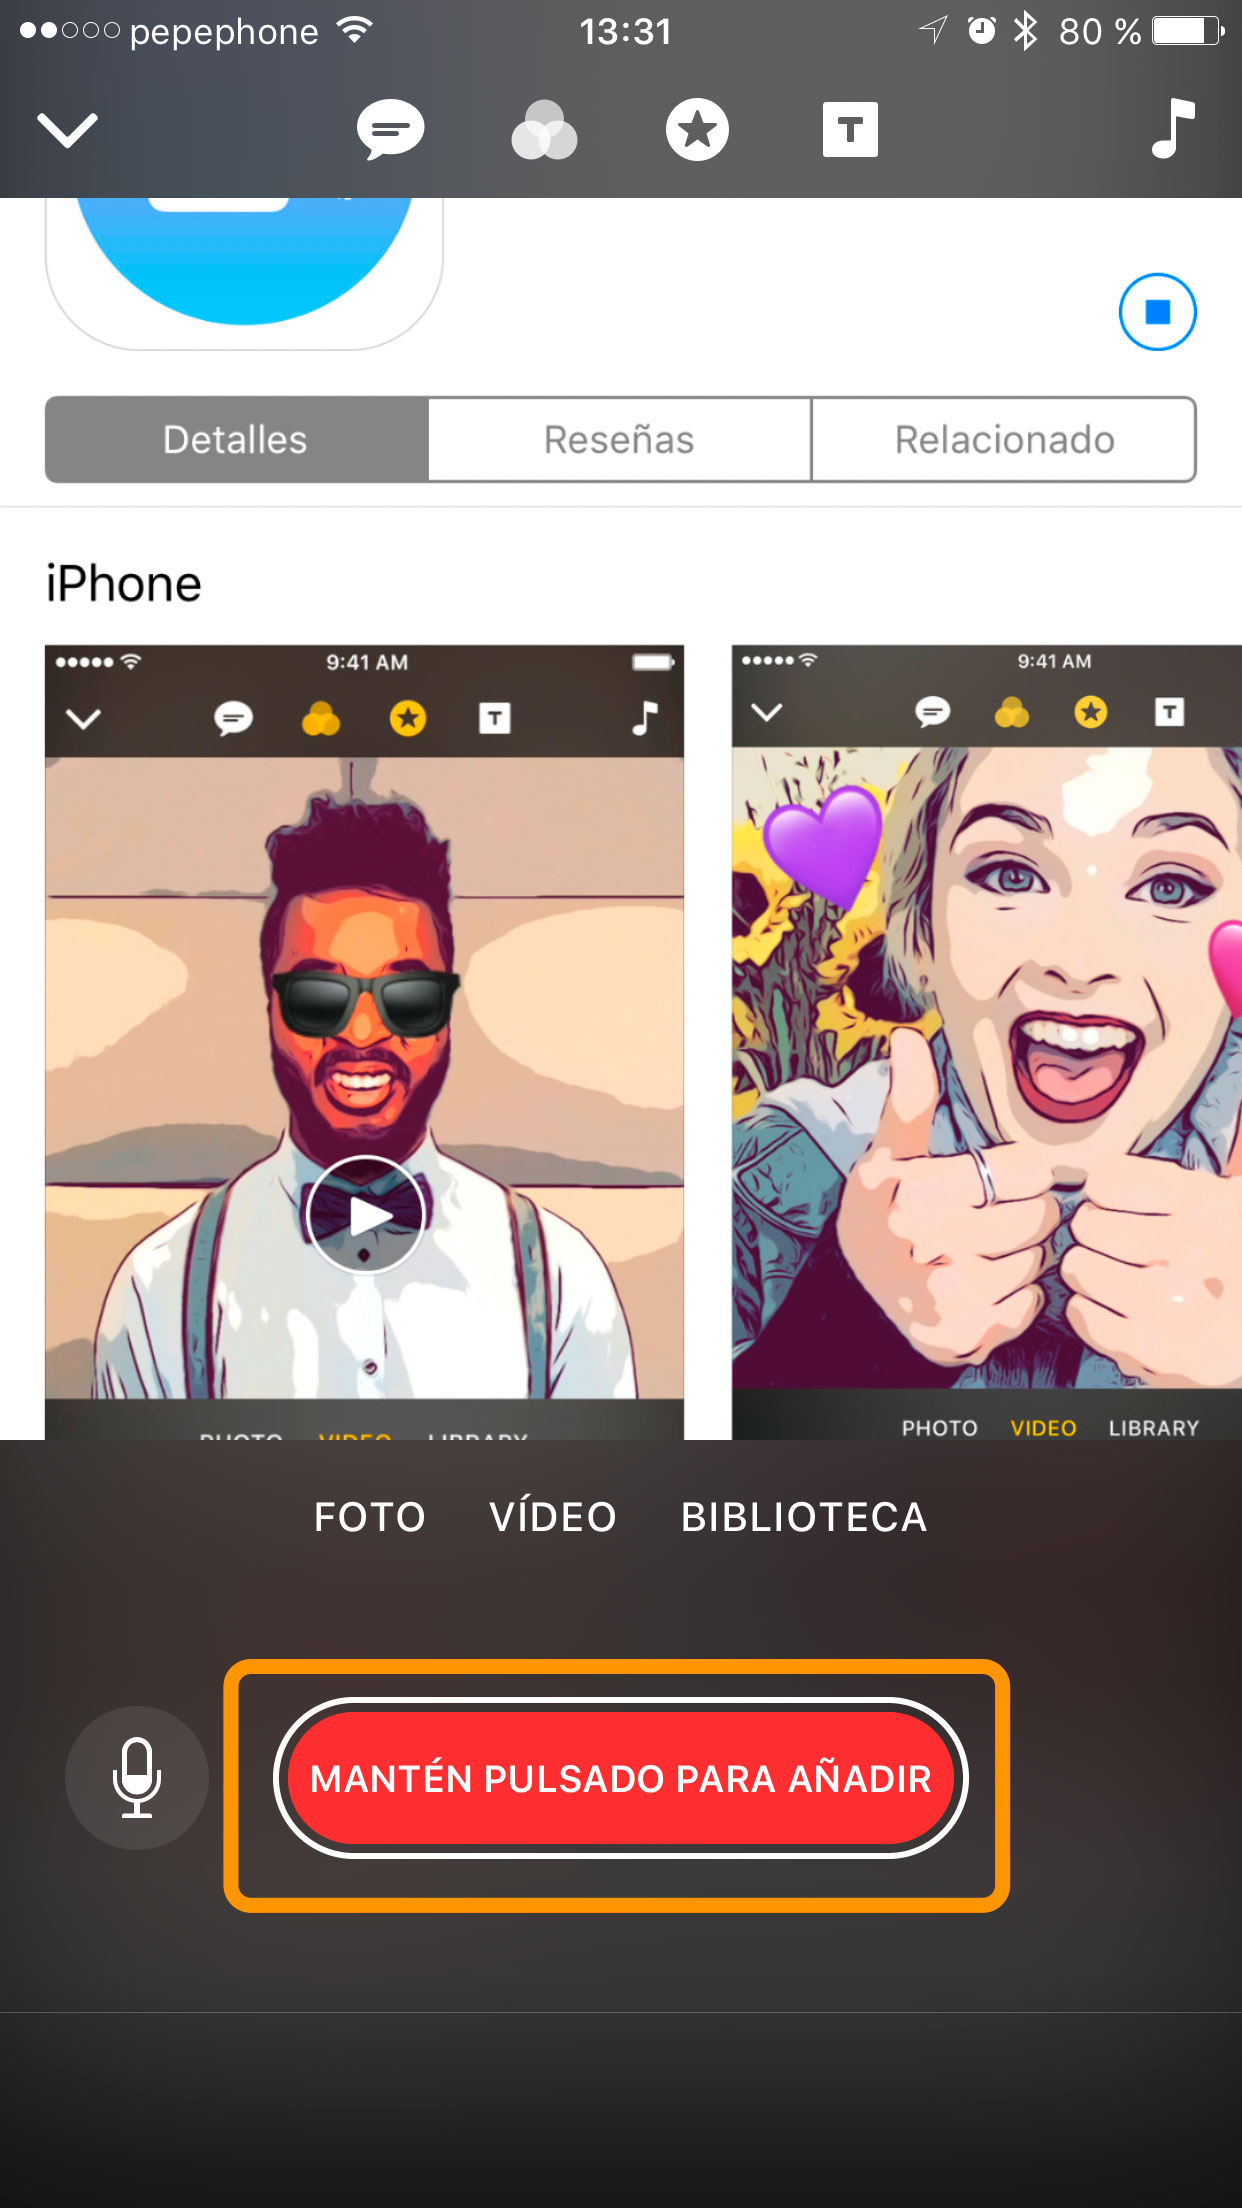
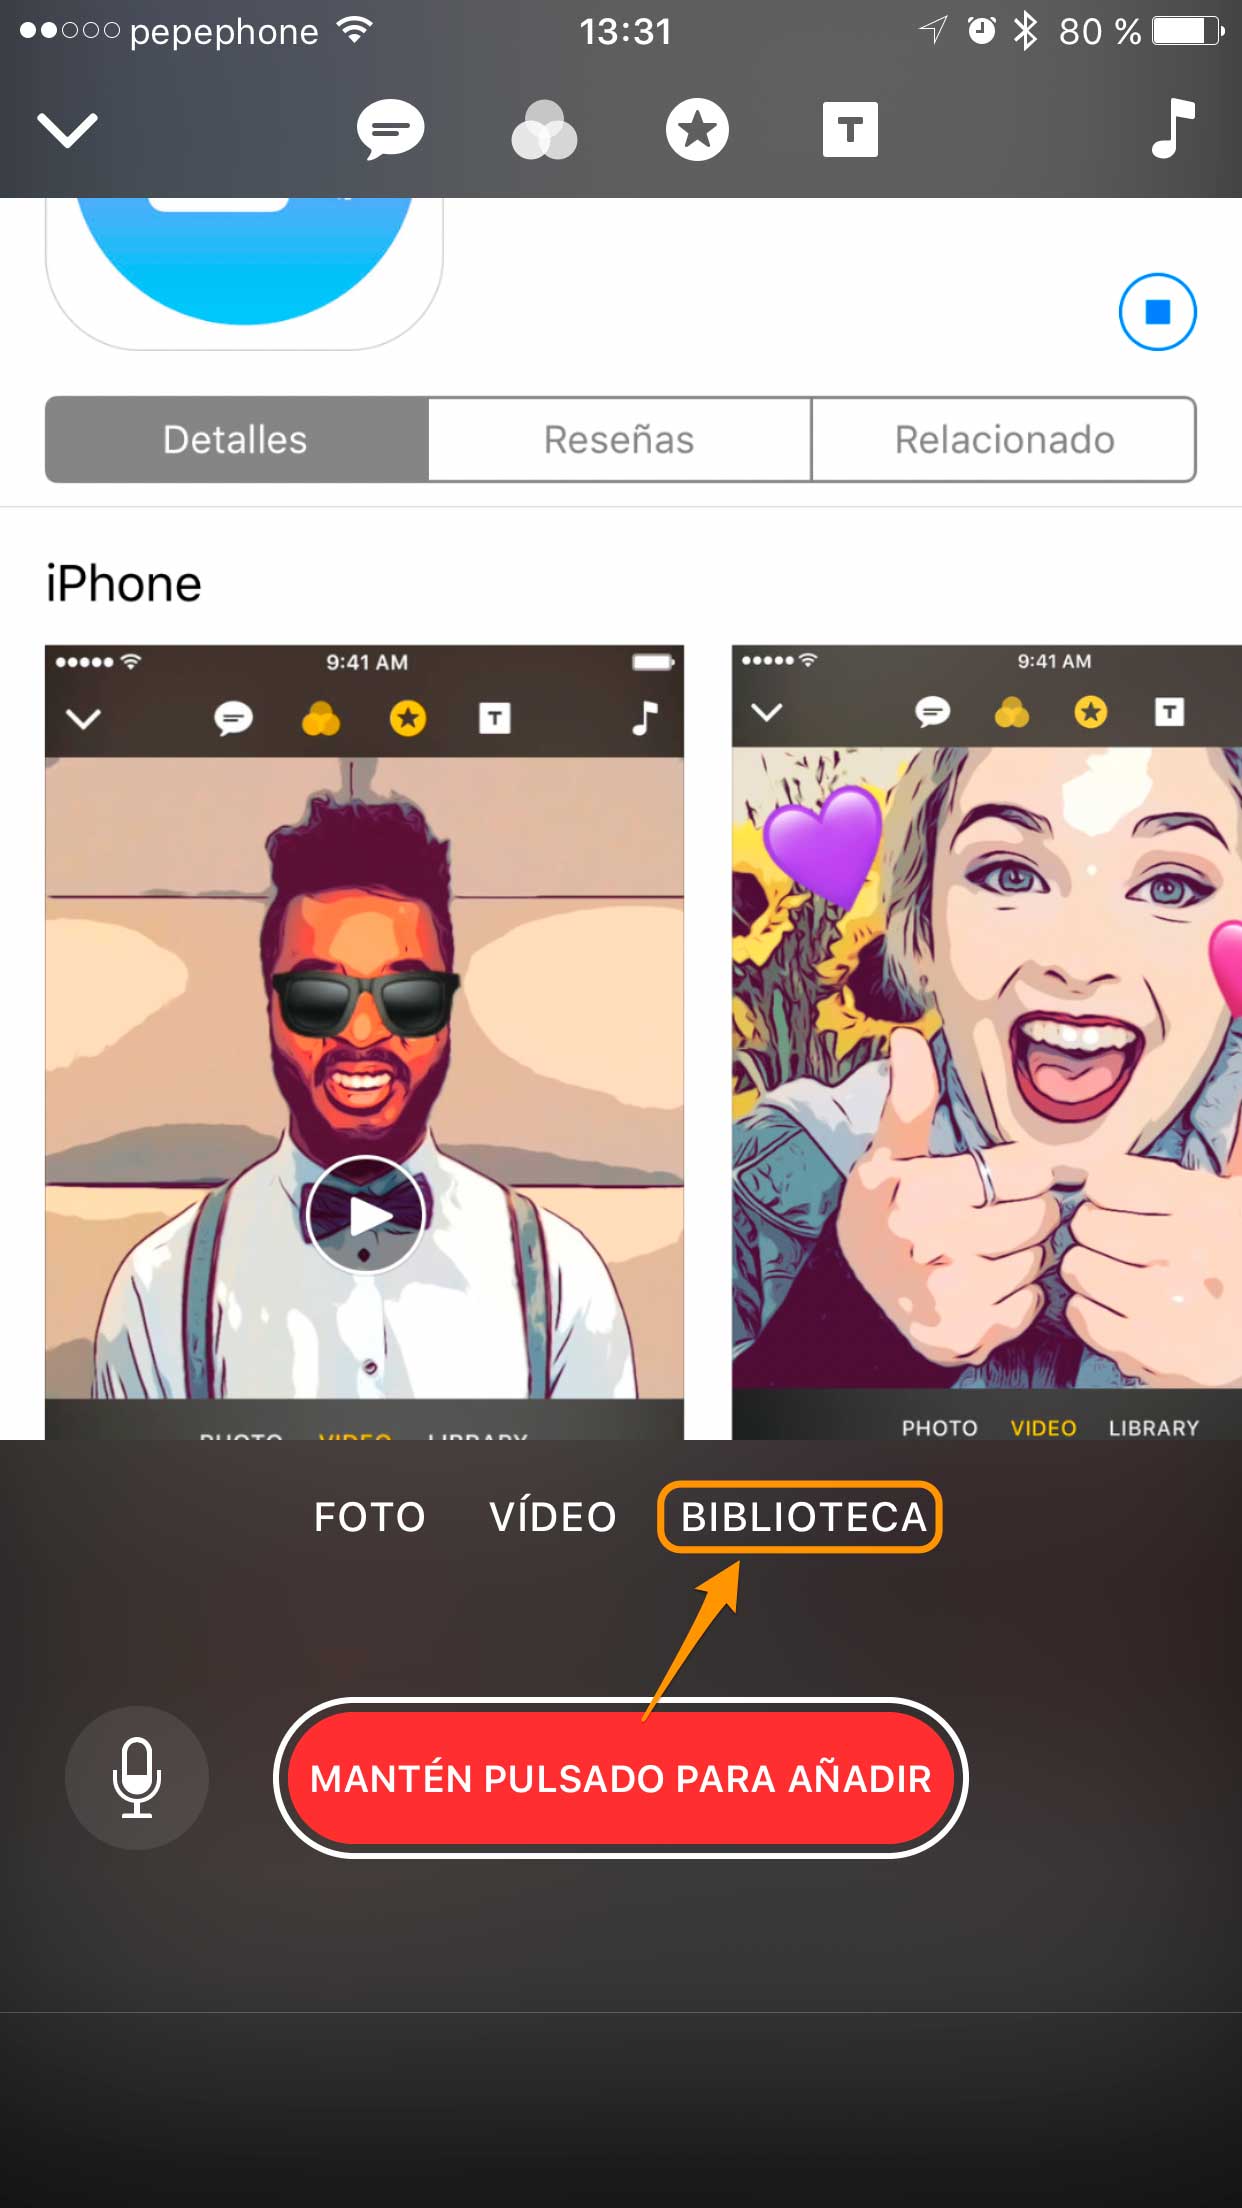
How to add photos and videos to Clips
You can add content to your montage directly from the application, that is, you can take photos and live videos using the Clips camera, or choose from everything you have saved on your iPhone roll.
To take photos and videos with clips
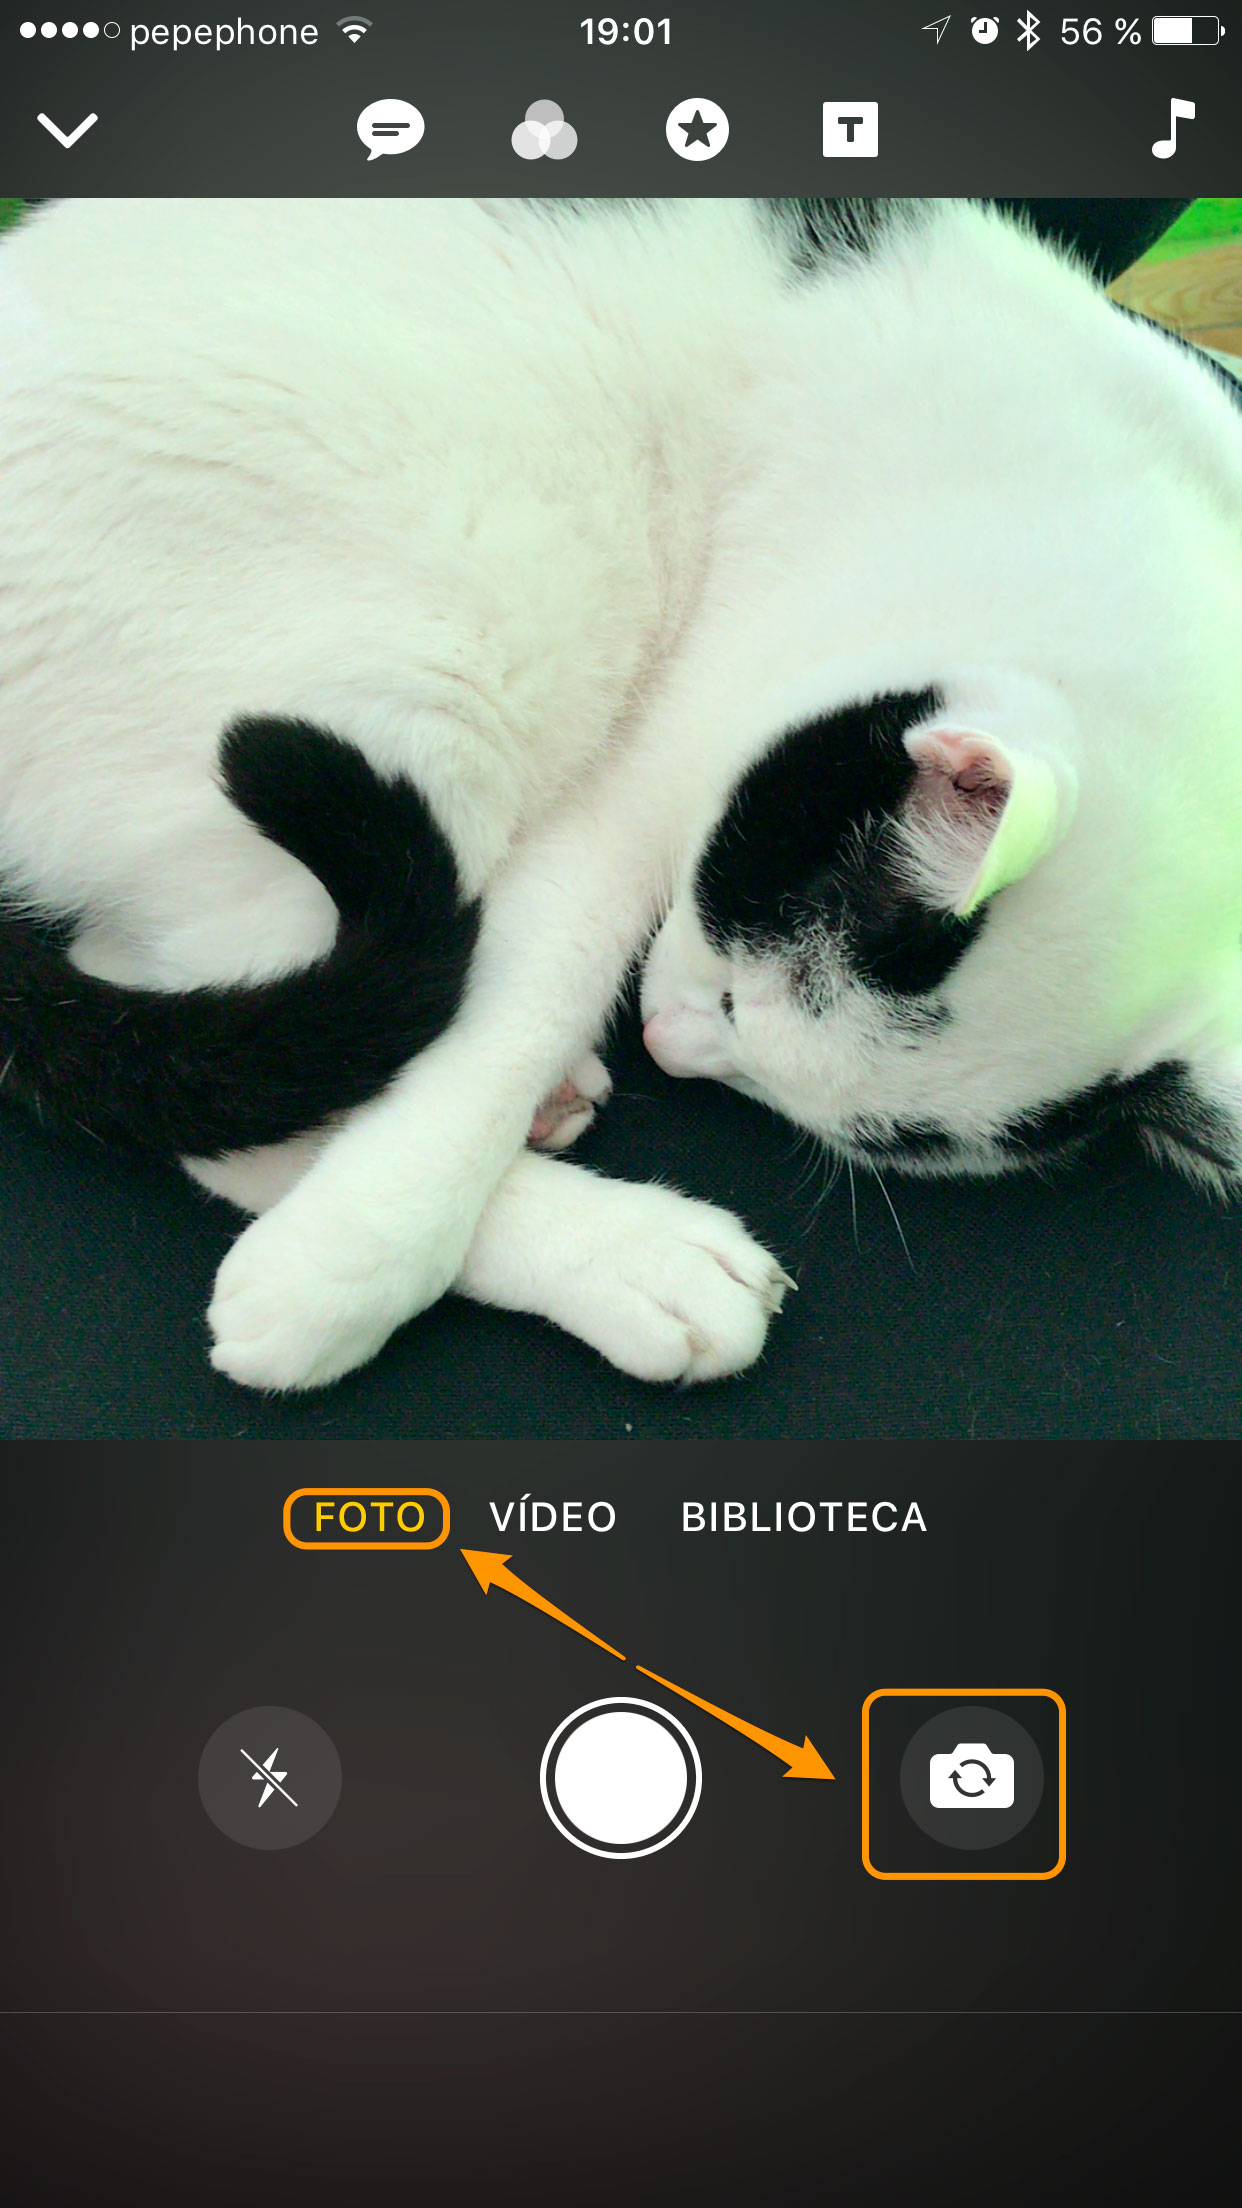
If you would like to take a photo with Clips of something that is happening at that very moment touch the Photo button and take the snapshot. You can choose between doing it with the rear or front camera by touching the button that we point out in the screenshot.
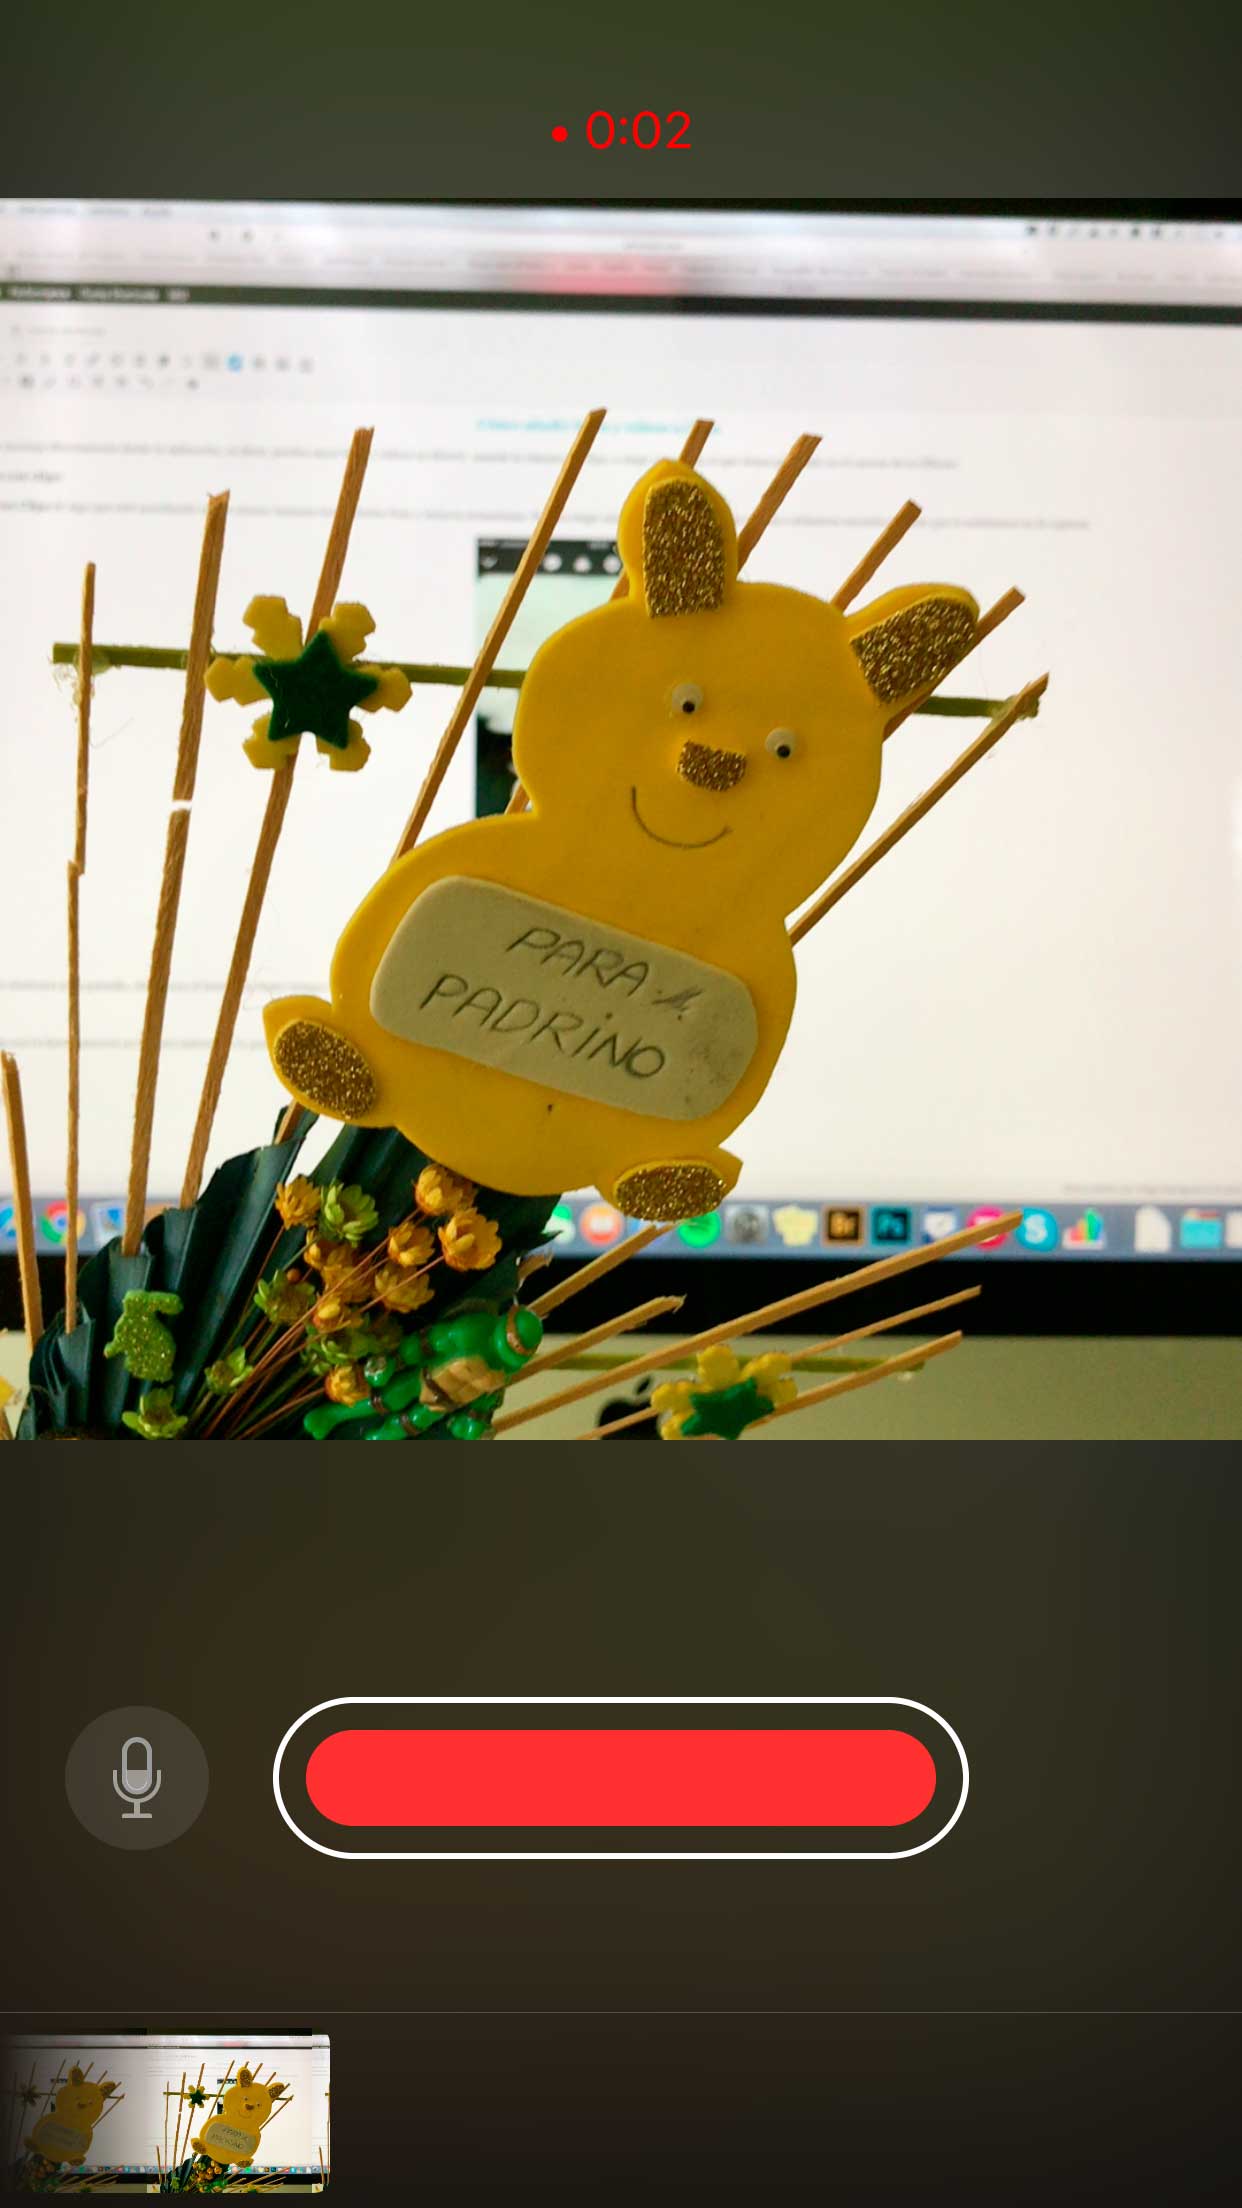
Once you have done it will be displayed on the screen, now tap the red button for as long as you want it to appear on screen in your final montage. When you release the button the clip with your photo will appear on the bottom of the screen.

To make a video with Clips
Tap the Video button to launch the camera, then tap the red button to start recording. Don't let go until you're done. When you drop it, the entire video will be added as a Clip to your montage.
To add a photo from your library
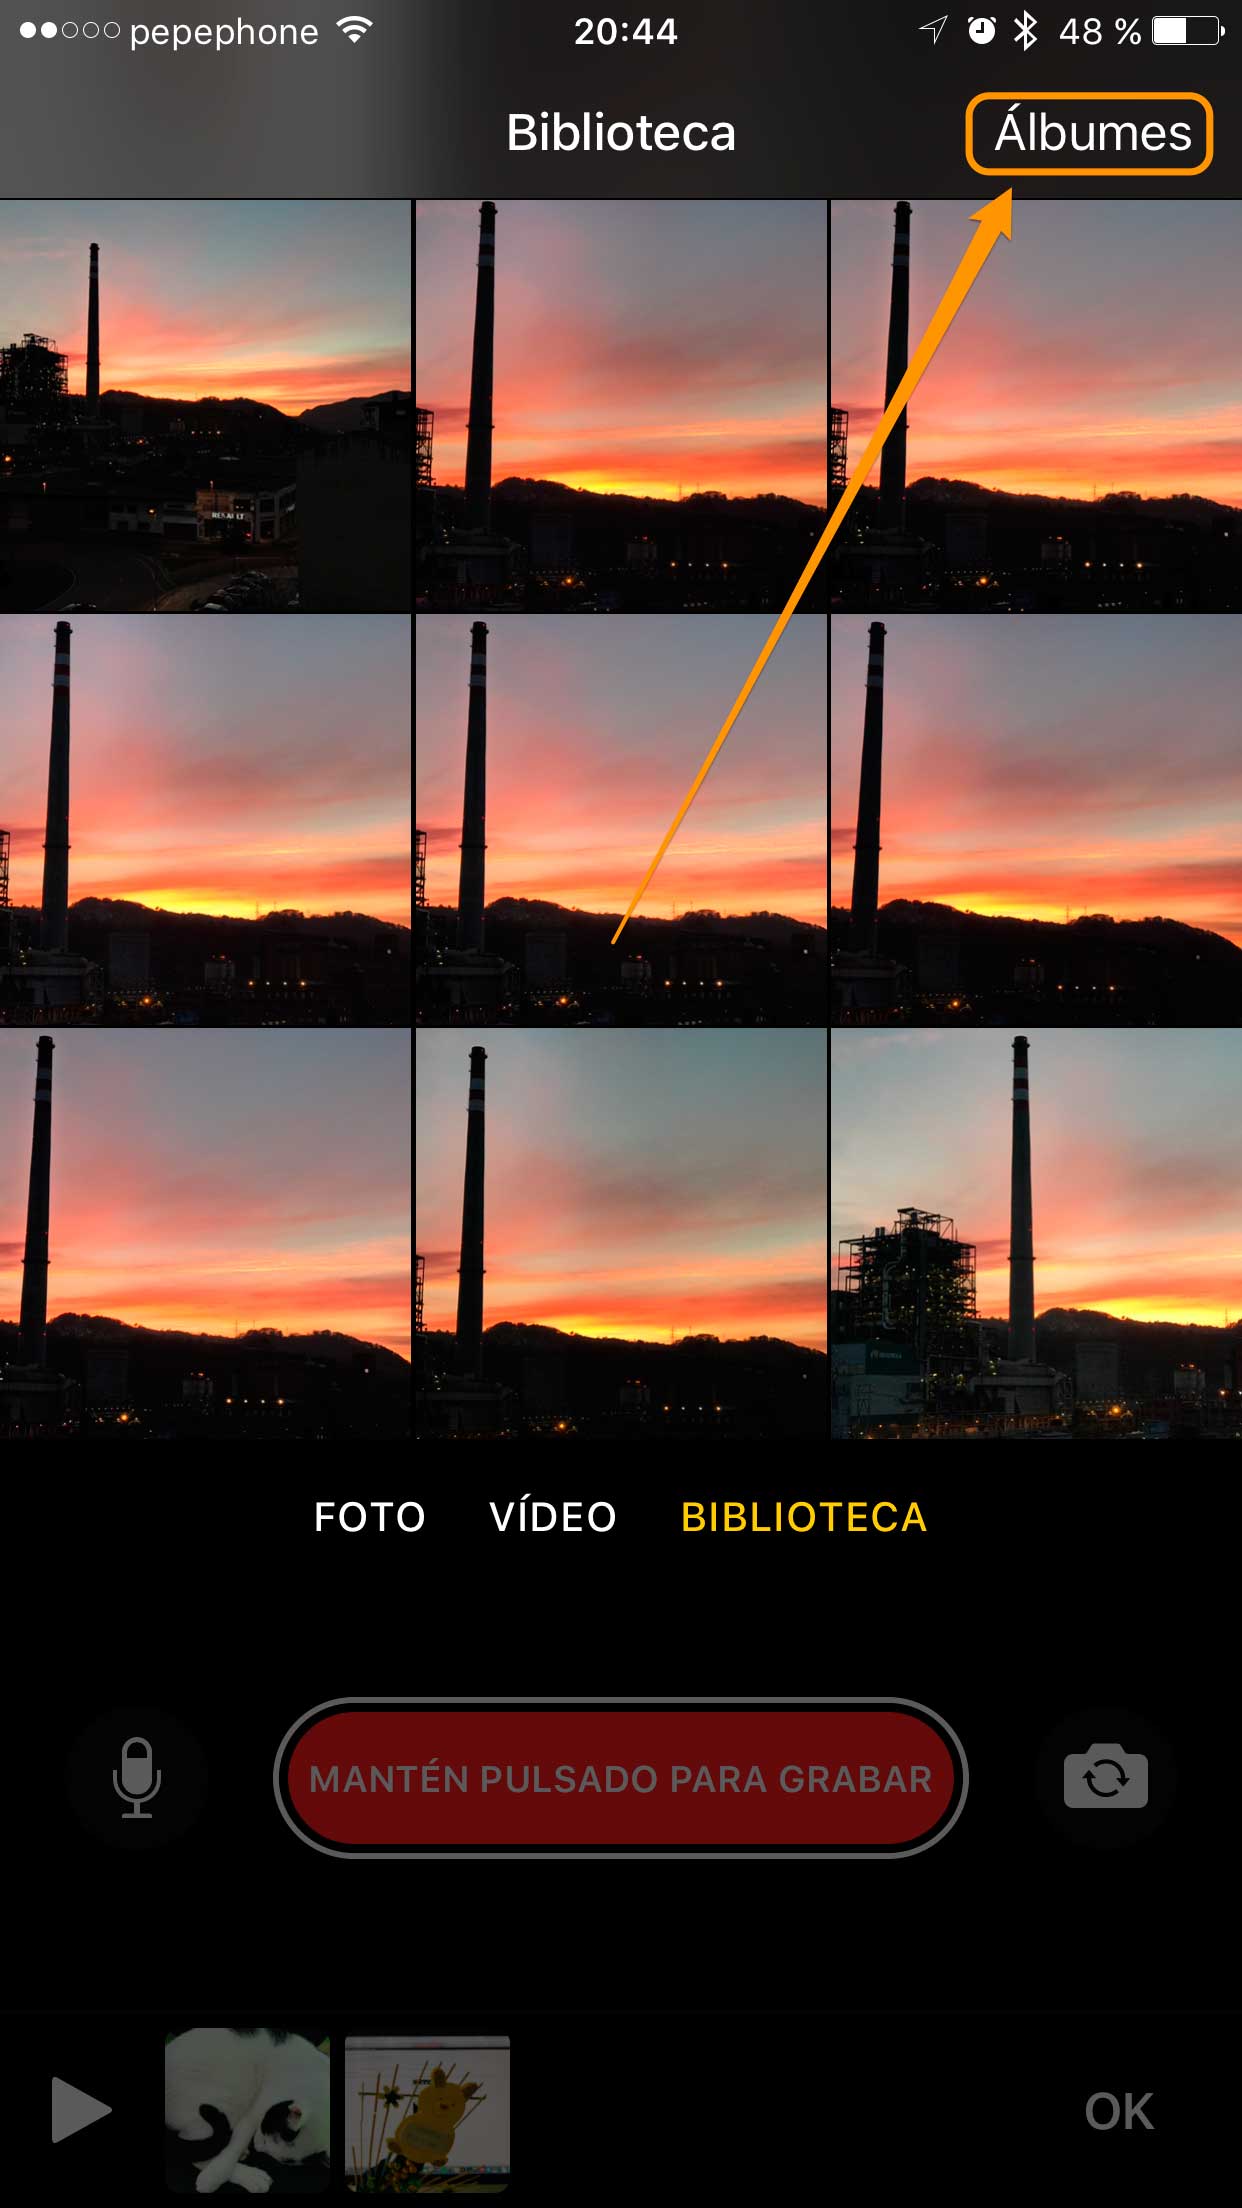
If what you want is to add a photo from the ones you have in the iPhone roll, touch the button Library.
Now you only have to choose one, Scroll to see all the photos on your roll or access the albums. Only the photos you have on your device will be shown on this screenIn the next step we tell you how to find the videos...
Once you tap on one of the photos, it will take up the entire editing screen, touch the red button again for as long as you want that appears in your montage.
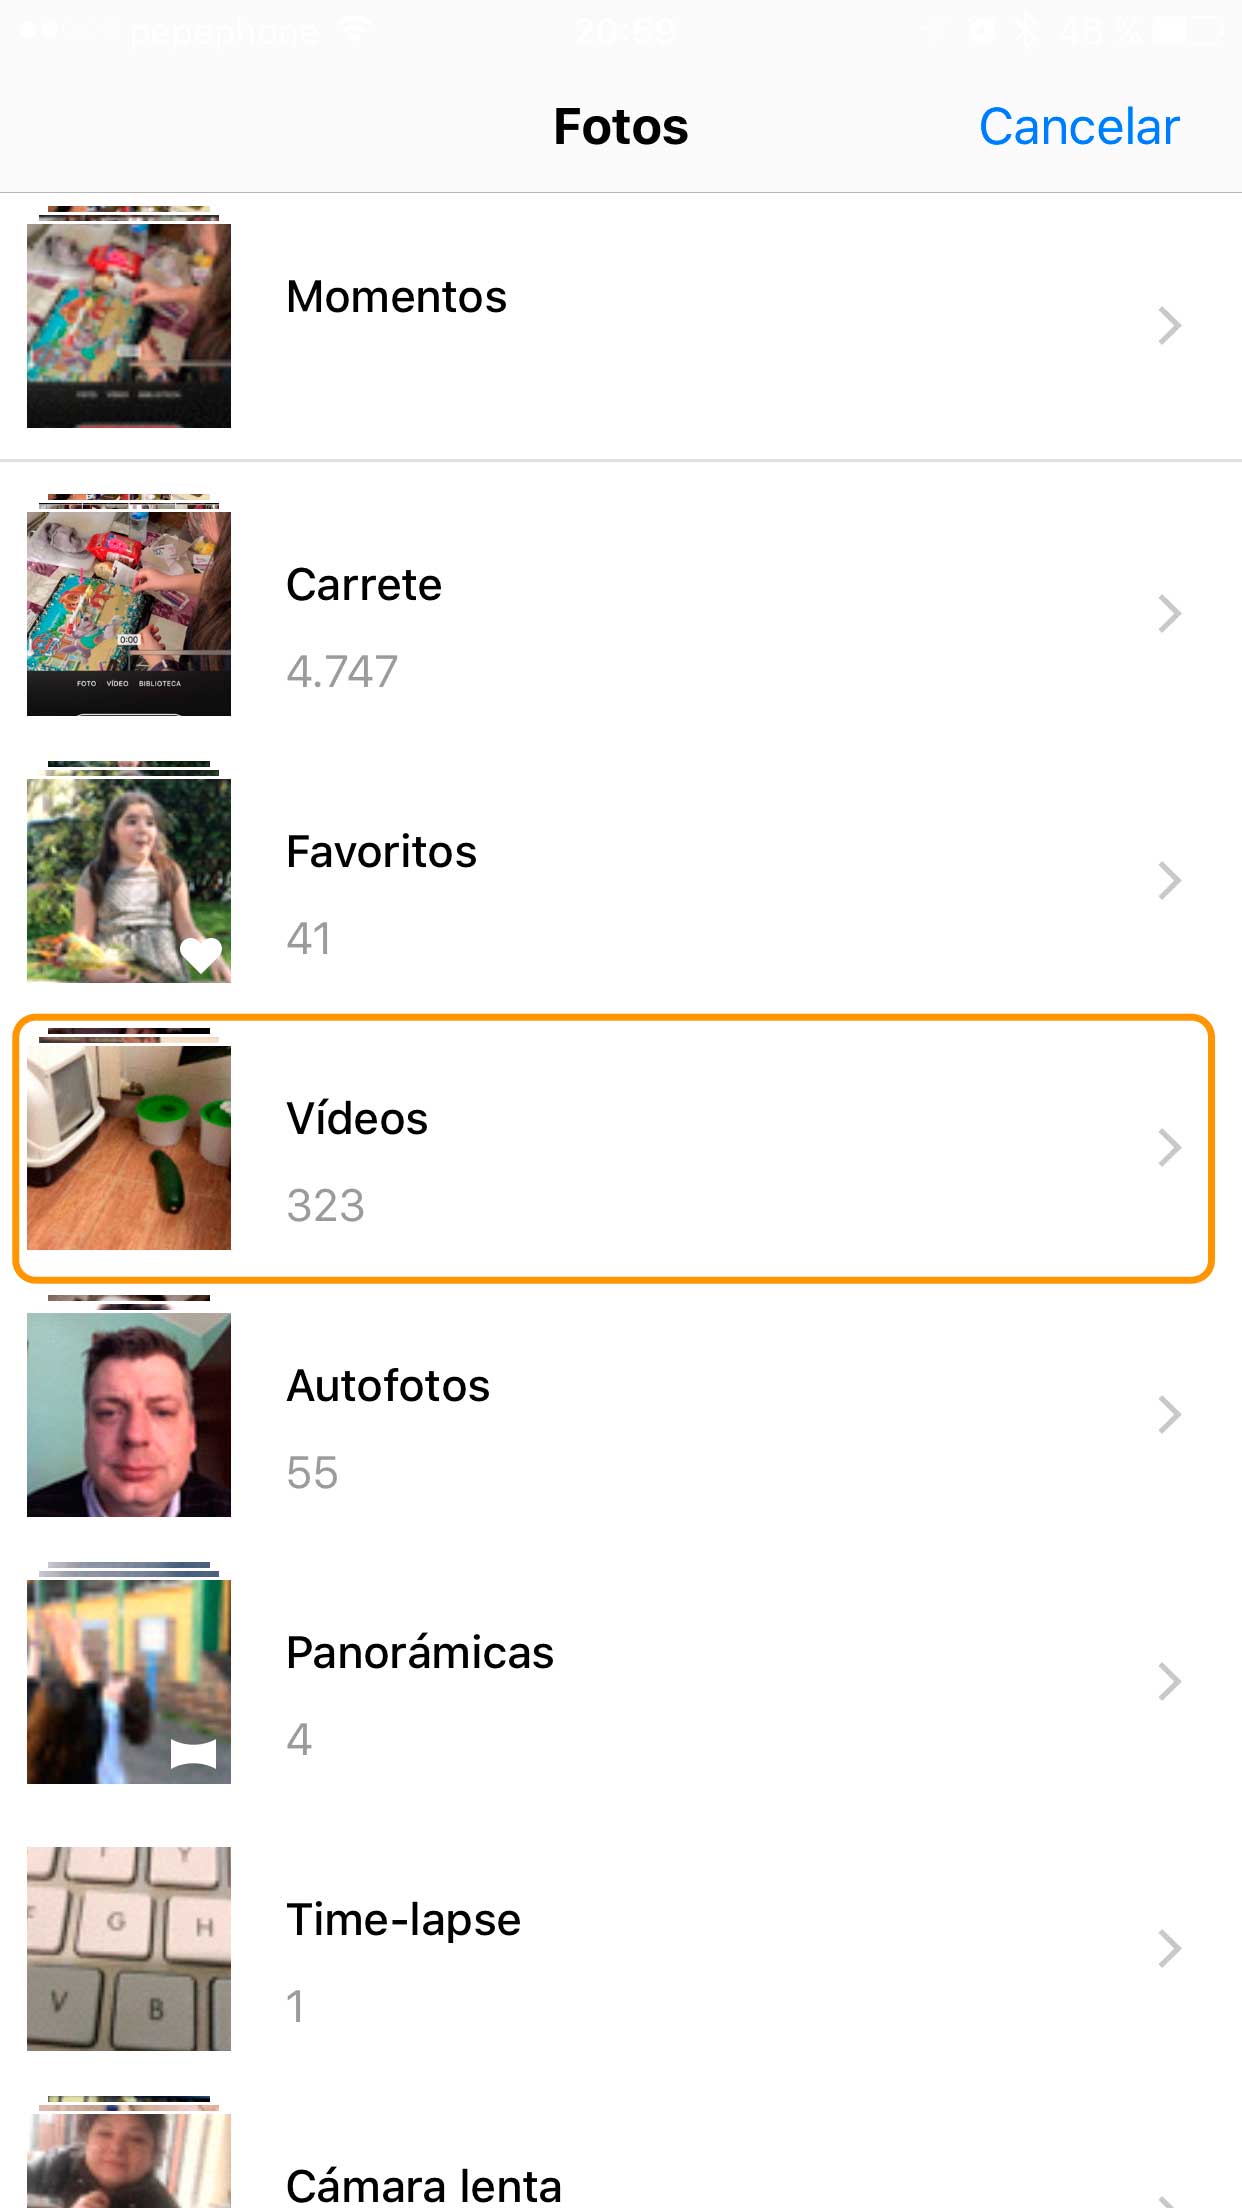
For add a video from your reel tap the Library button again, then tap the button albums.
Now find the video album on your iPhone and tap on it. Choose the video you want by tapping on it, it will open automatically in the editor.
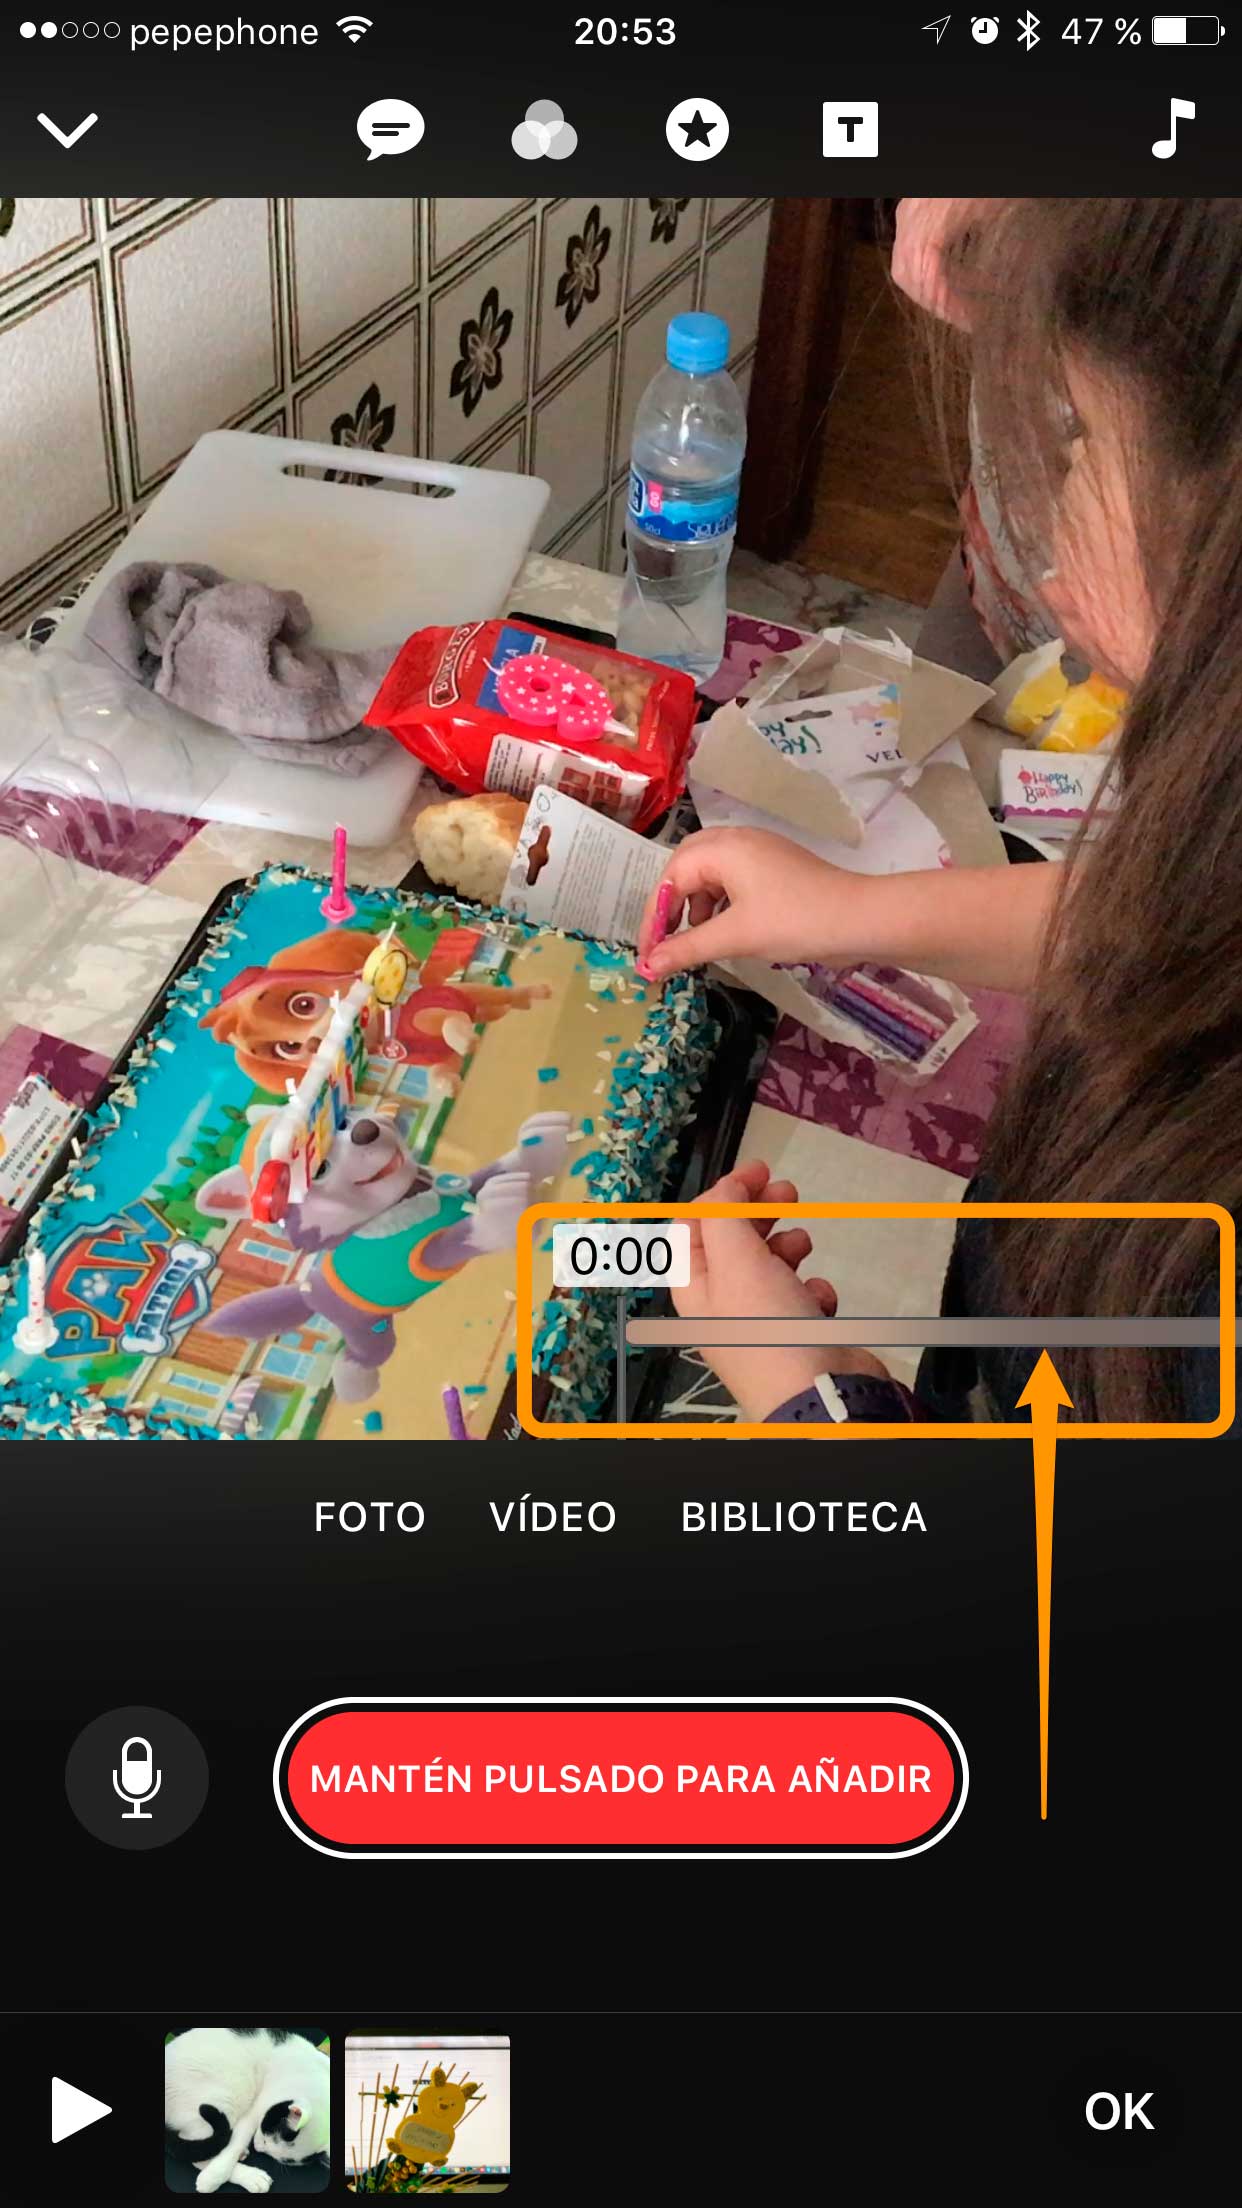
You can select starting point of the clip by swiping from left to right in the time bar you will see.
How to Add Effects and Transitions to Clips
Now that we know the basics of Clips, let's go with what will give your videos a fun look, the effects.
You can add three types of effects to your videos:

- dictated text: Something very innovative, when activating this effect everything you say will be transcribed into text on the screen.
- Filters: In the initial version of Clips you have 7 filters to choose from for your photos or videos, there aren't many, but Apple has promised to update the application frequently, so I'm sure more will arrive soon.
- Rich text, shapes and emojis: Here you can choose formatted text, various shapes, and even widgets that update with the time or location you are. To find the emojis you must slide your finger from right to left of the screen.

In addition to these effects we can also add transitions to our videos and even music.
This is how effects work in Clips
It is important that you know that whatever effect you add (Spoken text, filters or shapes) will be added to the entire clip, you cannot add it to a specific moment of it.
You can add the effect before hitting the red button or after doing it in the editing screen.
How to make your effect show up at a specific time
If you are editing a video from the roll or a photo and you want it to look like a continuous scene and include the effect in a specific part of that video, you just have to do the following:
- Insert the effect in a specific part of a video:
- With the video selected, touch the red button until just the moment you want to add the effect, when you reach it release the button
- Without moving the video timeline, choose the effect you want to apply to that moment. Once you have it, press the red button again and hold it for as long as you want the effect to appear
- If you want to continue the video without the effect, remove it from the screen and touch the red button again to create a new clip.
- Enter a photo in which an effect appears at a specific time:
- With the photo selected, tap the red button for as long as you want it to appear without the effect, release the red button when you think it's long enough.
- Select an effect and touch the red button again so that it appears for as long as you deem appropriate.
- If you want the effect to be removed from the screen you just have to remove the effect and touch the red button again to create a new Clip.
How to Add Transitions or Titles to Clips
The transitions or titles are independent clips that your final composition is added and that will serve as an introduction to your video, to mark a change or to highlight a specific moment.
To add a title or transition, tap on the button that we point out in the screenshot below.
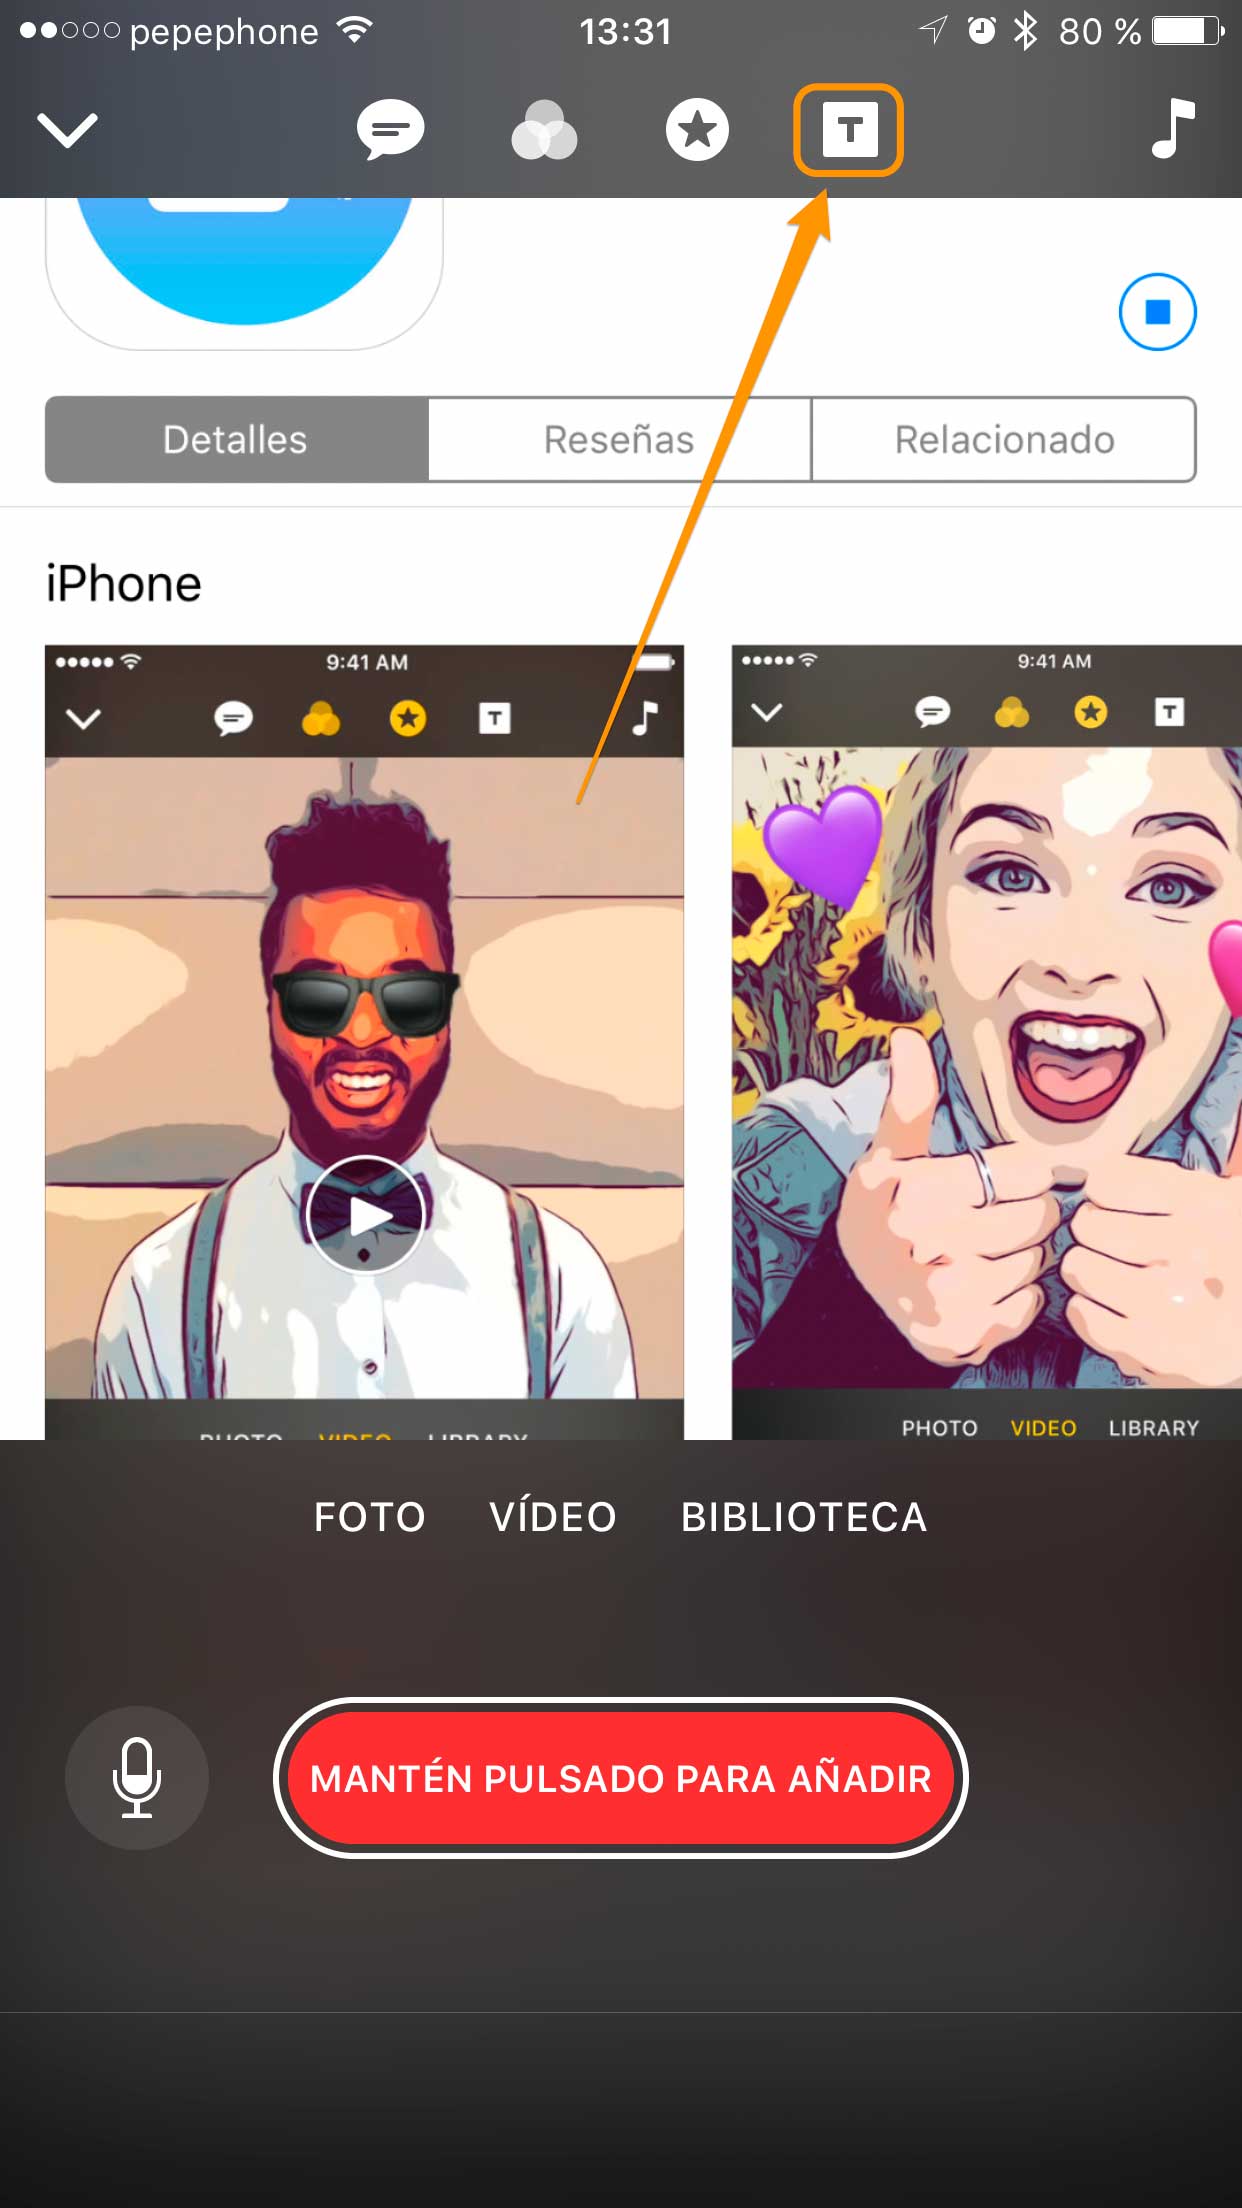
You can choose between 12 different types of titles or transitions. Tap on the one you like the most.
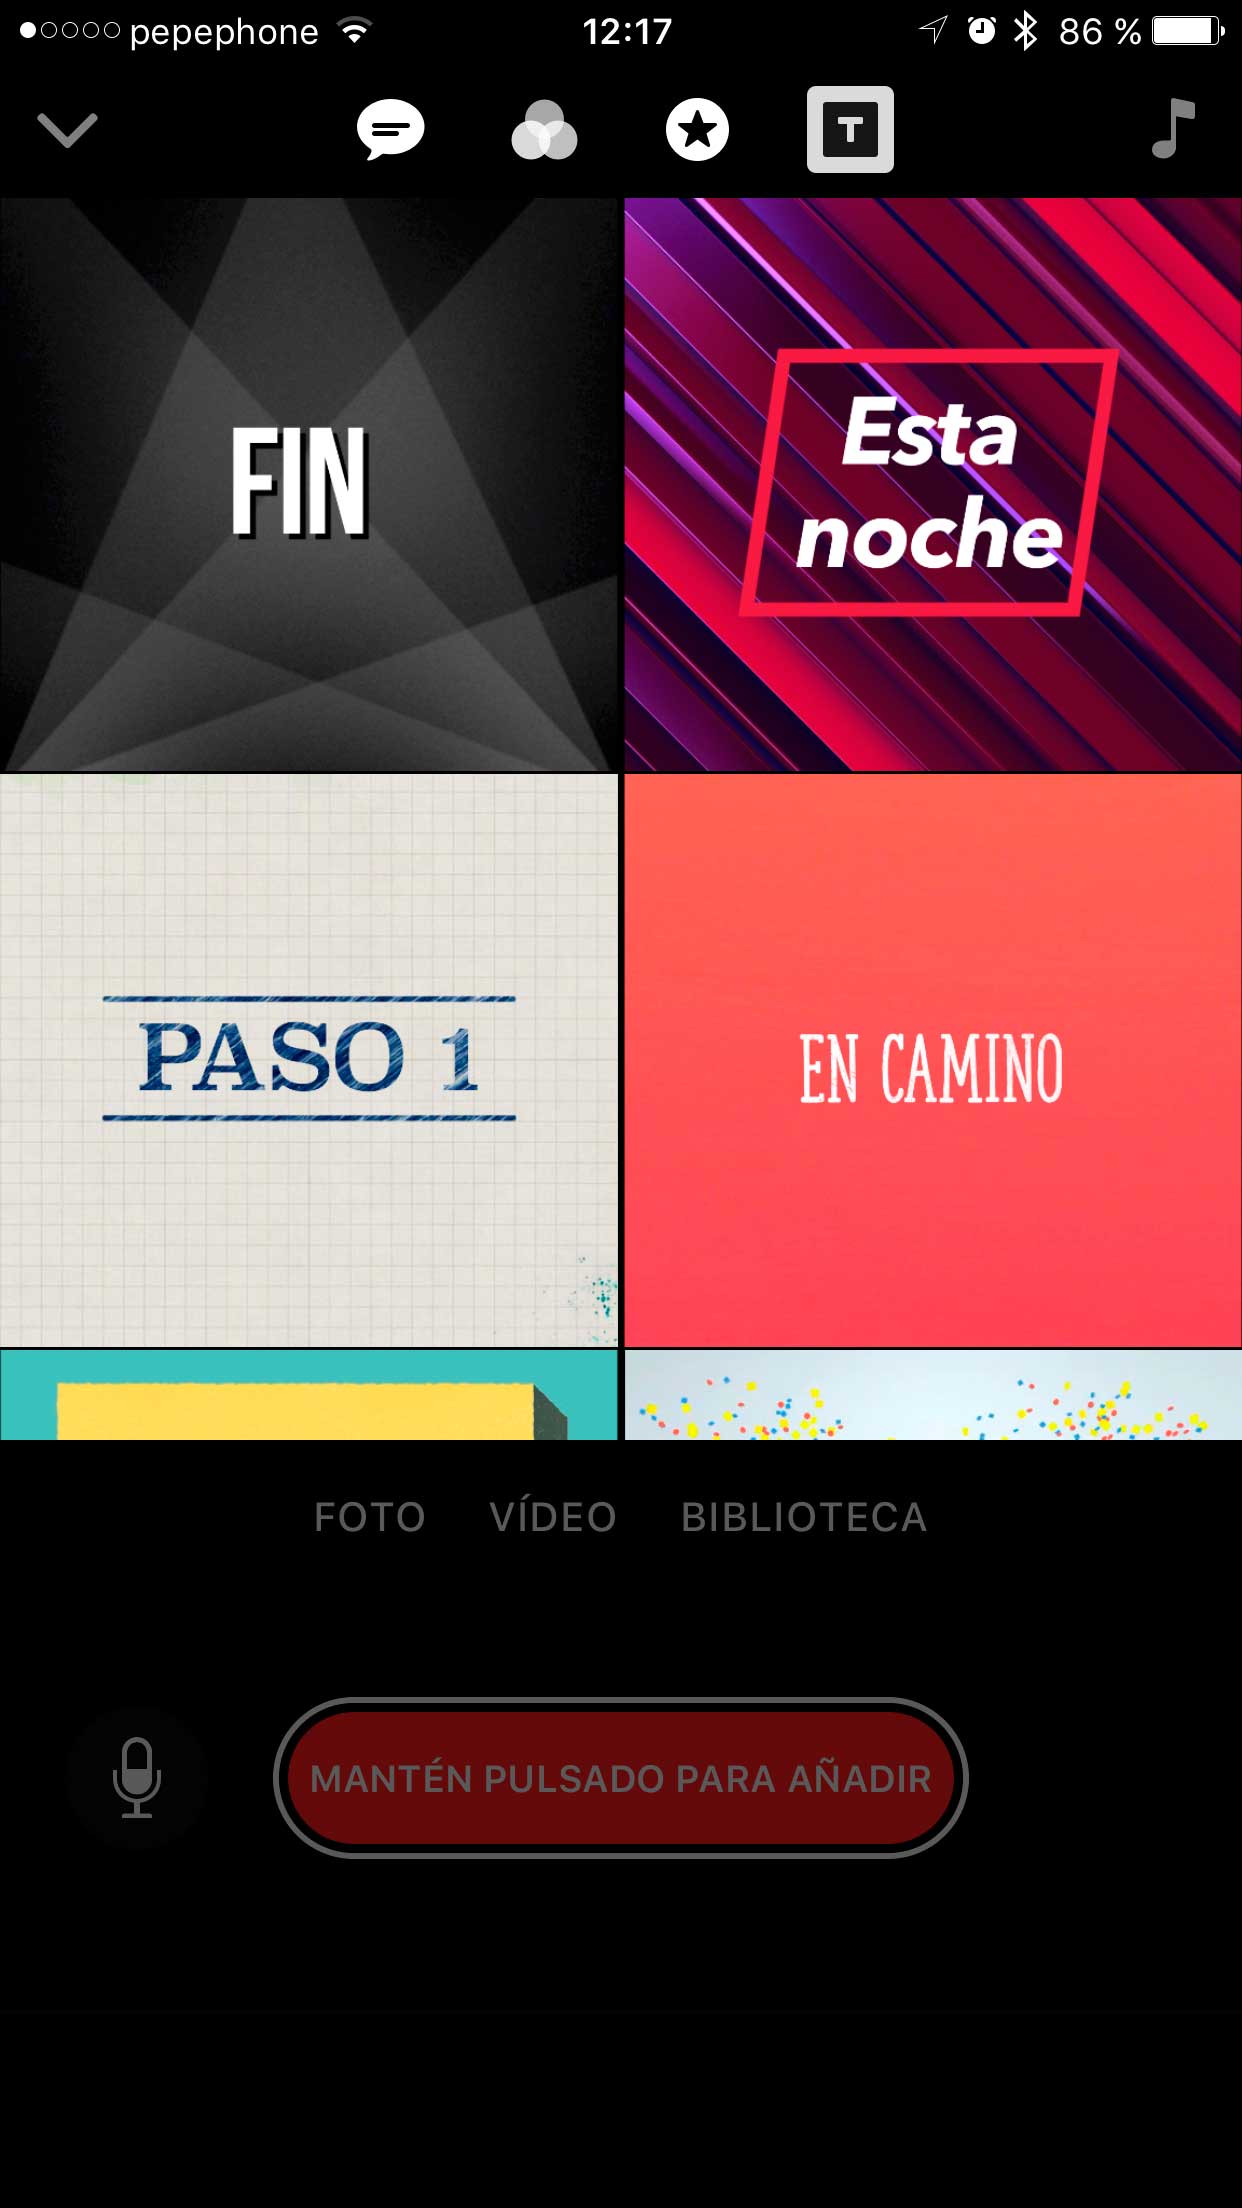
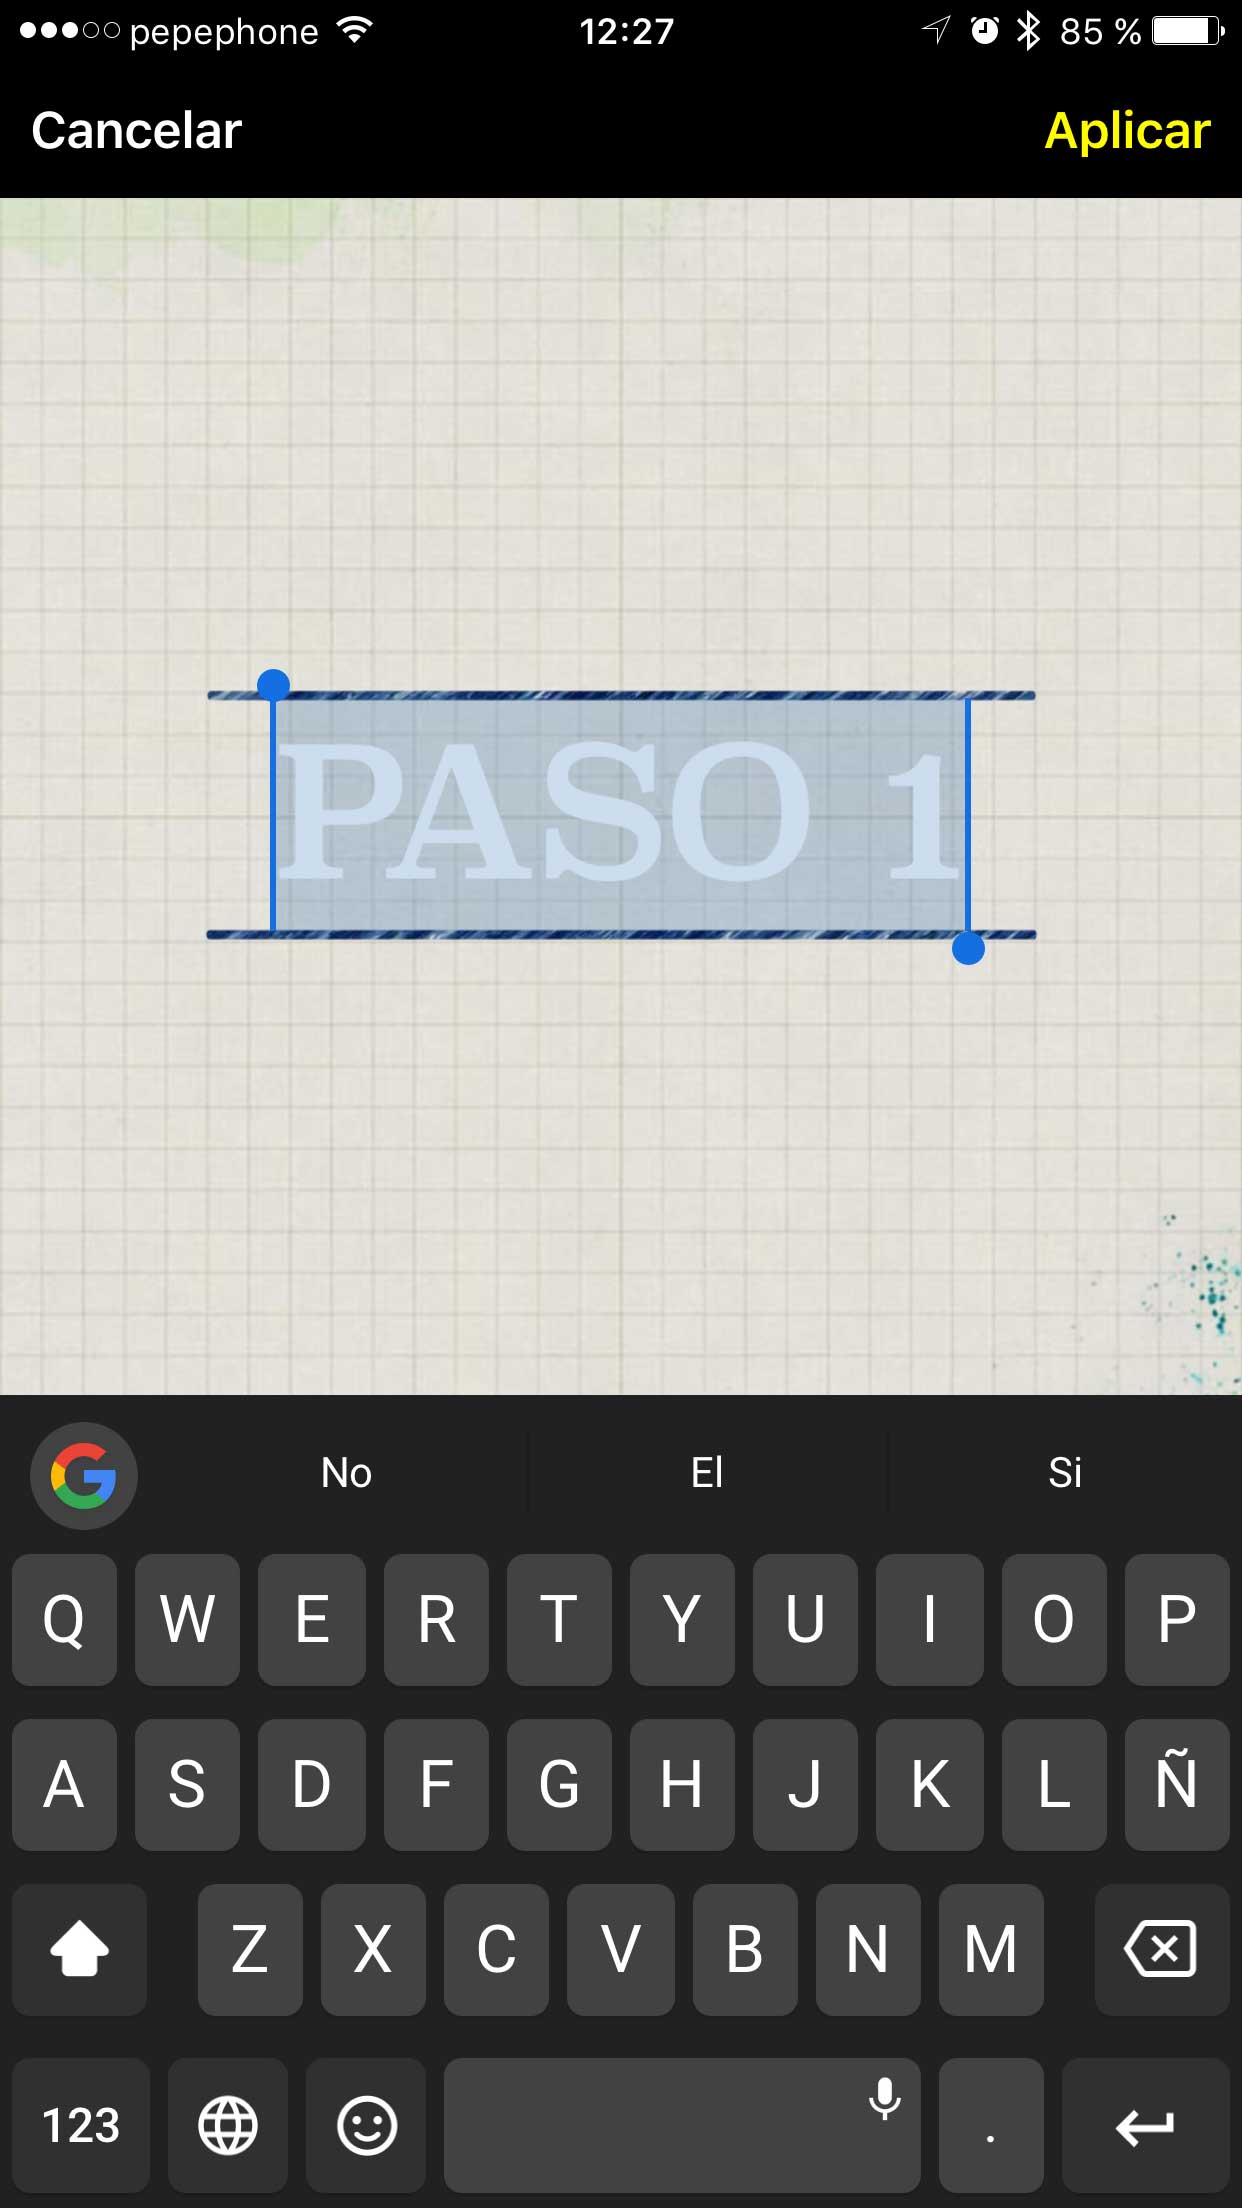
You can change the text that comes by default by tapping once on it, if you do, the keyboard will be launched, write what you want, the size will adapt to the length of the text. Each title or transition has its own effect.
Once you have it to your liking, touch the red button for the time you want it to appear in the final montage.
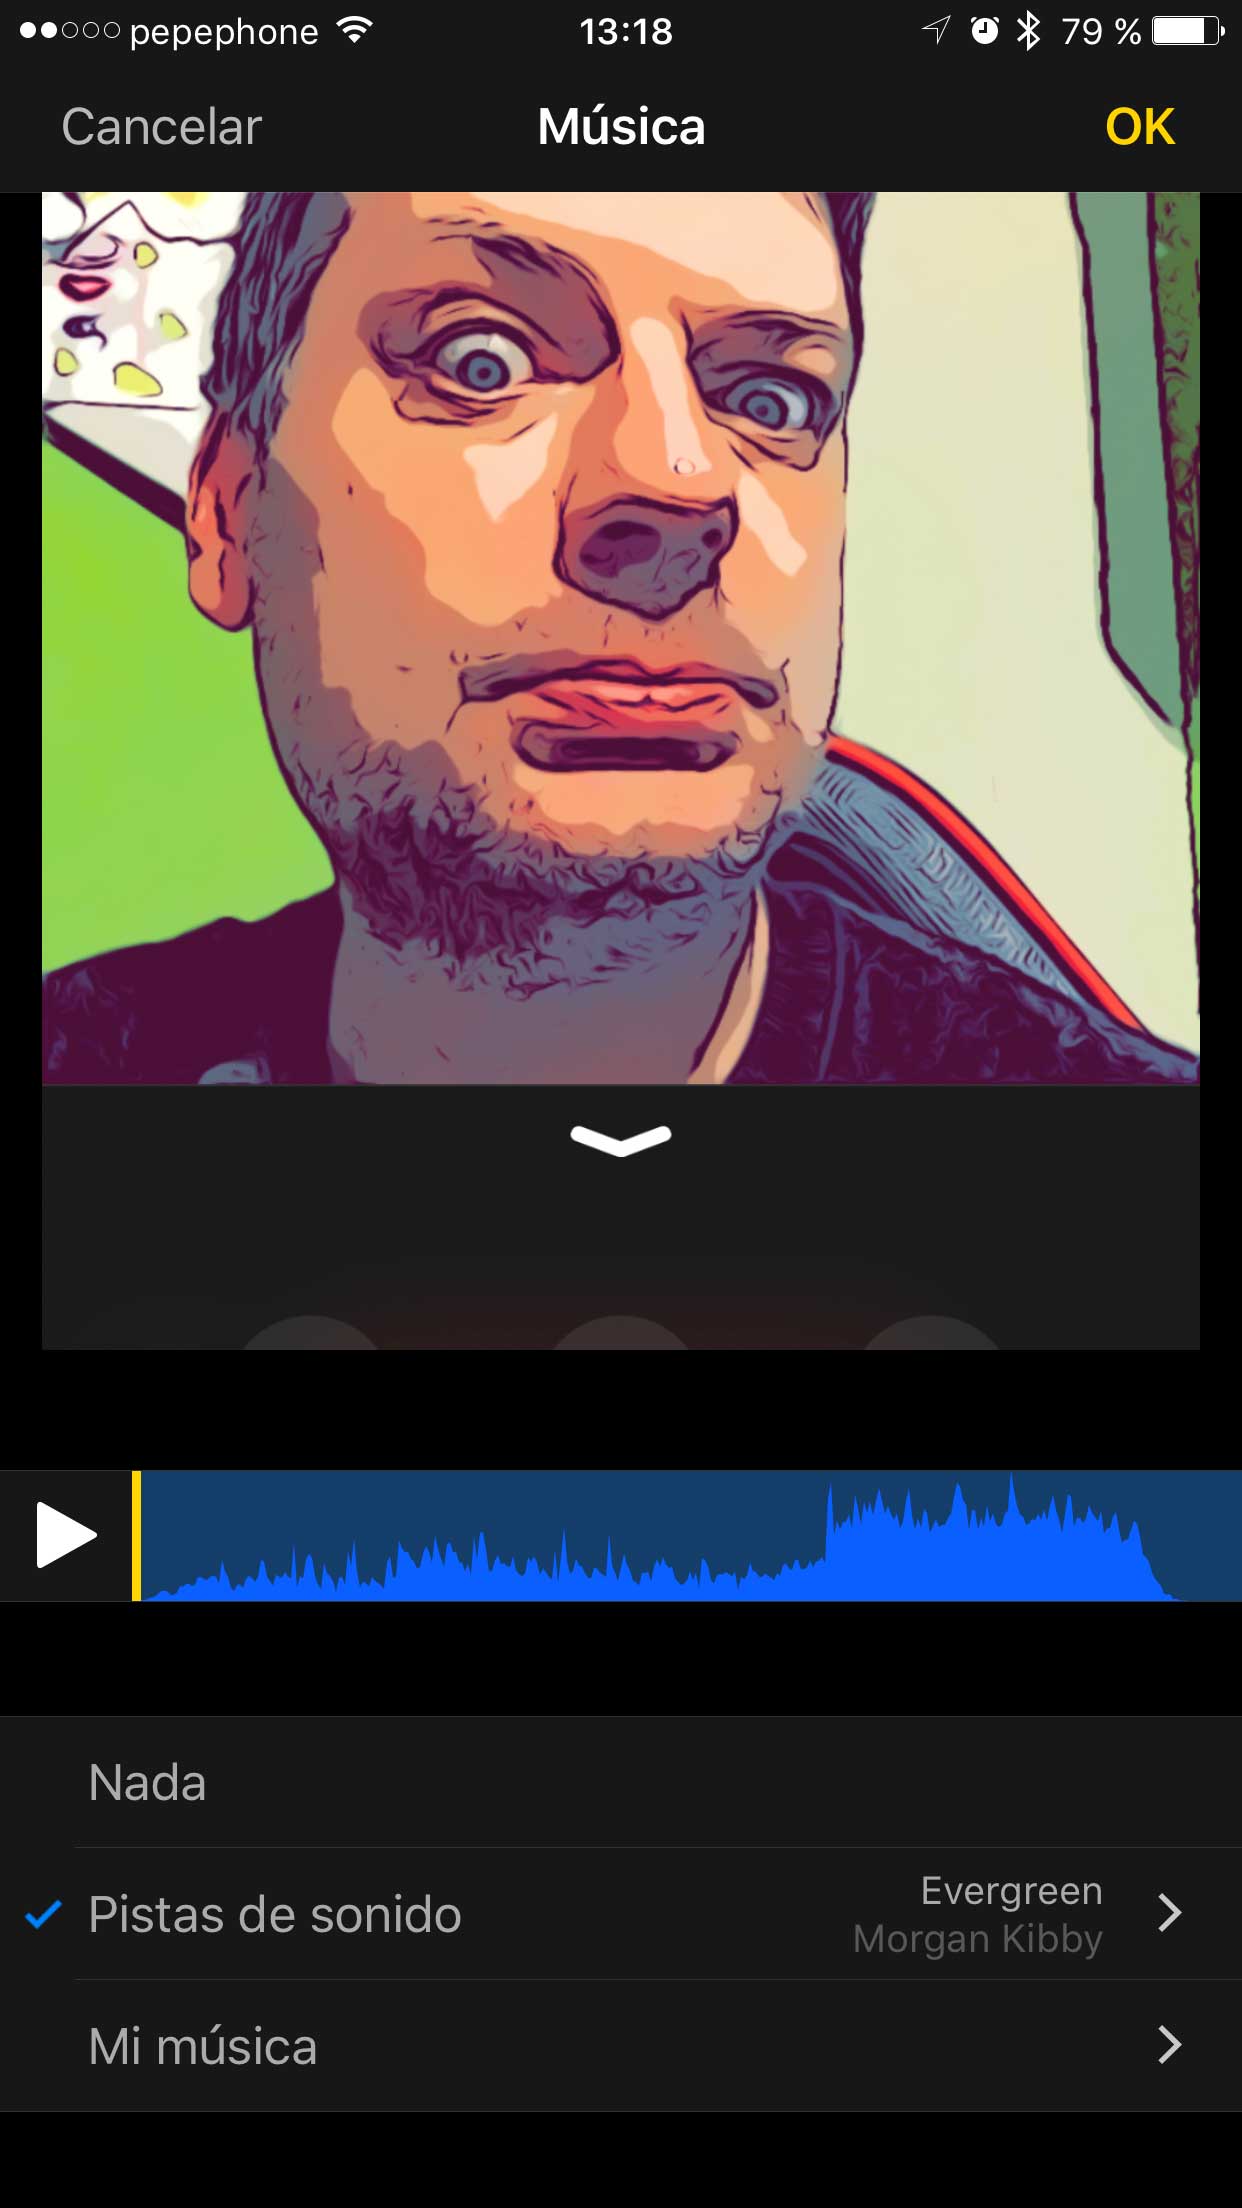
How to add music to your Clips video
You must bear in mind that if you add music, it will be heard throughout the video, you cannot add music to a specific clip or put more than one track, the one you choose will be heard from beginning to end in your creation.
The music you choose will automatically fit the entire duration of the video, so you don't have to worry about choosing one that lasts exactly as long as your video, just choose the one that best suits what you're counting on.
To add music touch the button in the shape of a musical note that you will see at the top right of the screen.
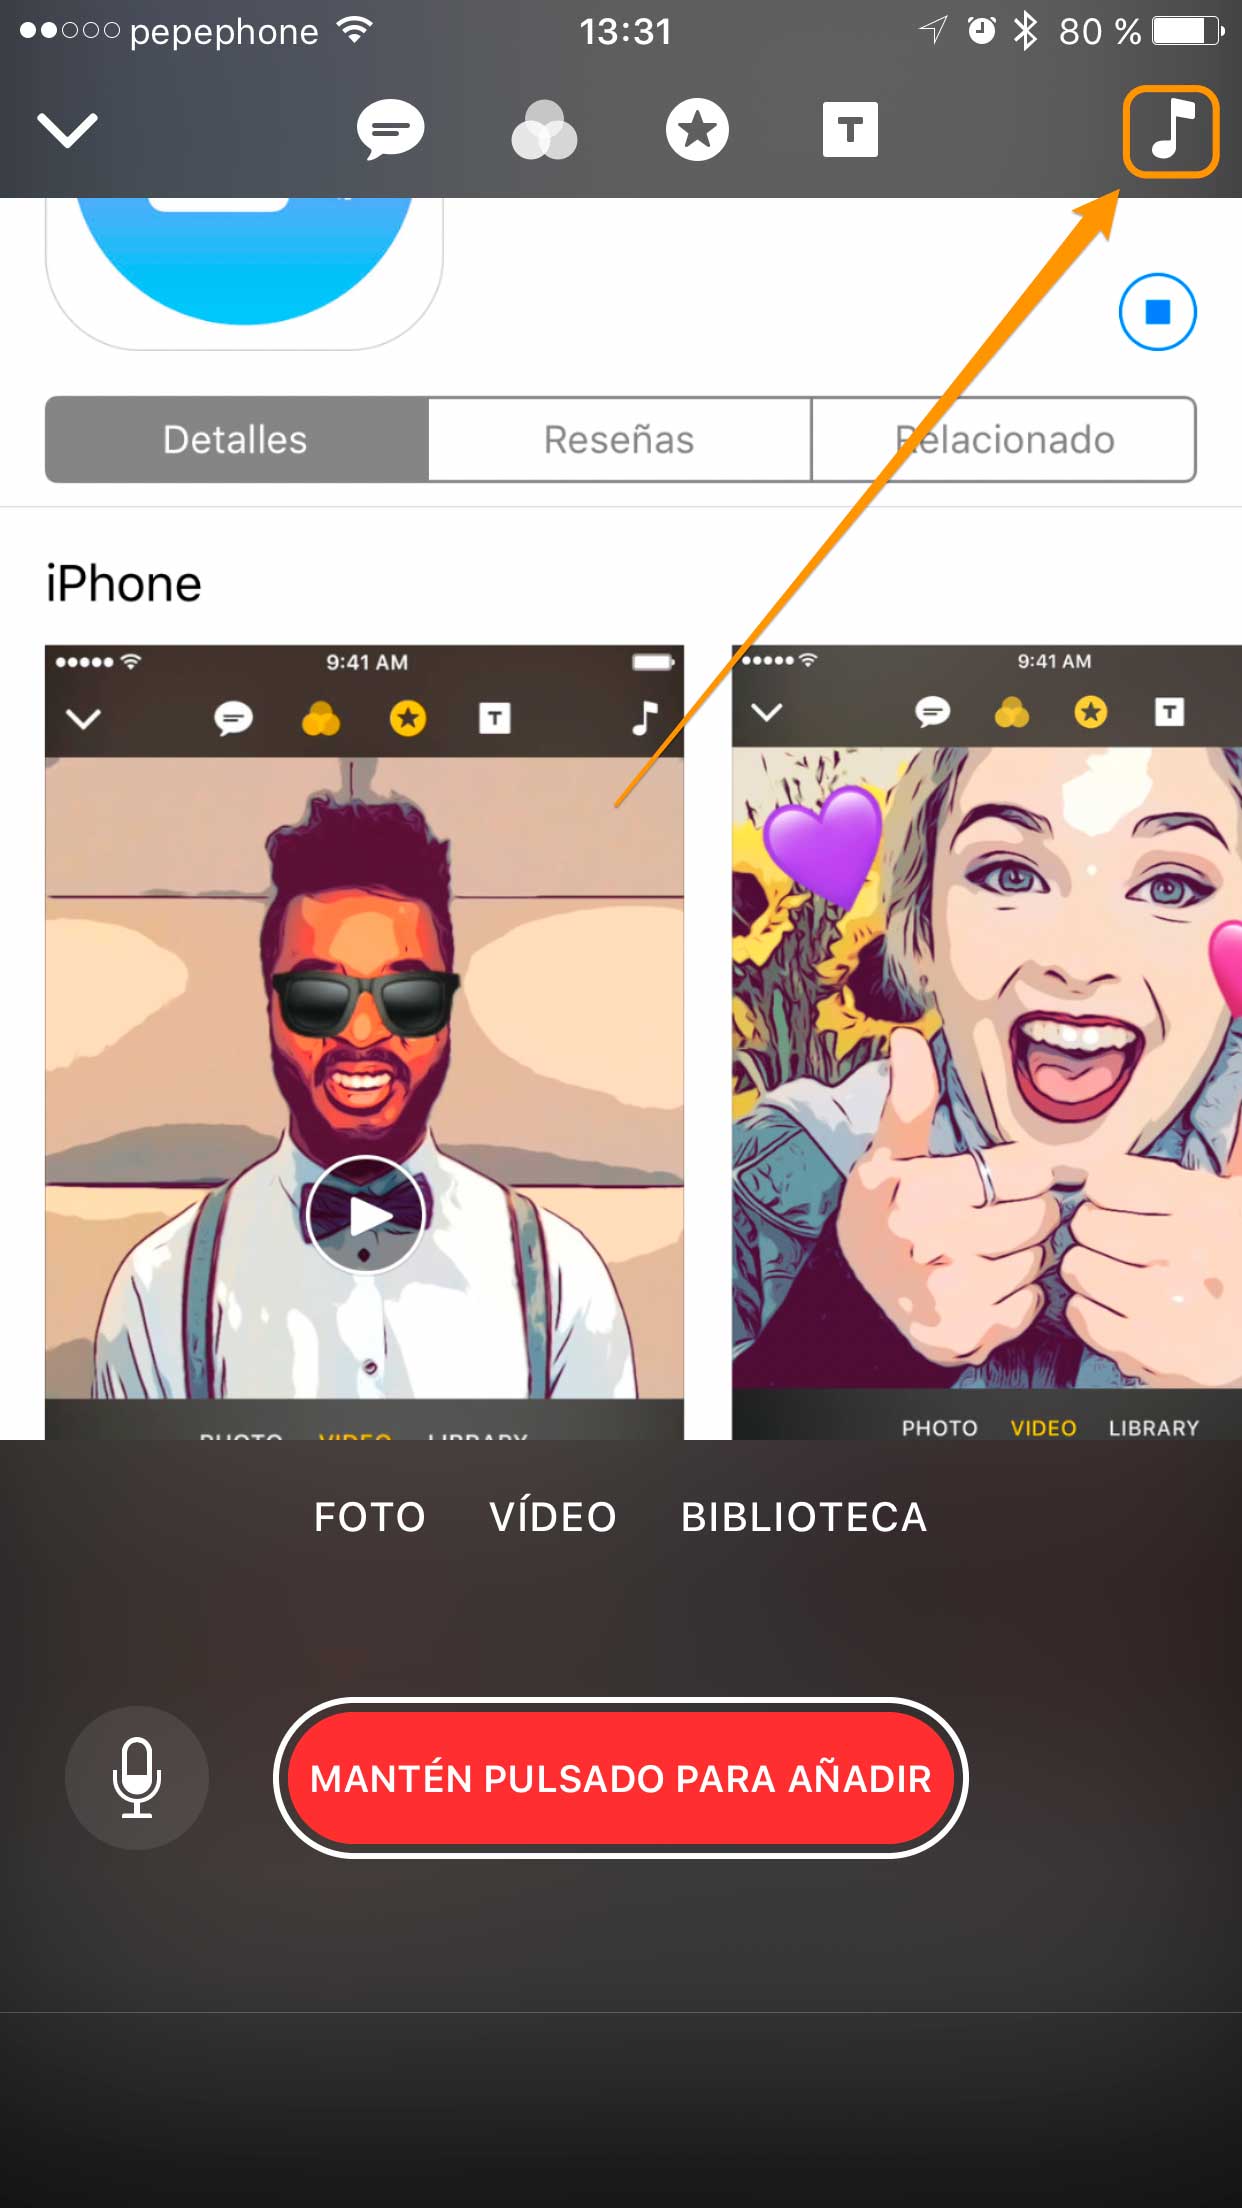
You have two options to add music, you can choose from the sound tracks included in the application (a total of 47 sorted by genre) or put any song from your music library.

If you choose your own music, you should keep in mind that you can only put your own music saved on your device, even if you are an Apple Music subscriber, the songs from this service will not be displayed. On the other hand, think that if you are making the video to publish on social networks, the music that you have stored on your iPhone is almost certainly protected by copyright and it is very possible that your video will have problems to be published, especially on YouTube or Facebook.
The 47 tracks included by Apple in the application are free of copyright and you can use them wherever you want without problems.

Tap on one of the tracks to listen to it. If you like it, touch it again to select it.
When you return to the video screen you will be able to see how the music you have put is, just press Play and enjoy...
Isn't it true that any video wins a lot with the right music? Well that, do not hesitate to add a soundtrack to your creation.
Edit screen in Clips, how does it work?
As we add Video Clips we will see how, at the bottom of the screen, the Time Line of our creation, that will be our editing area.

By touching one of the Clips, the different options will appear:
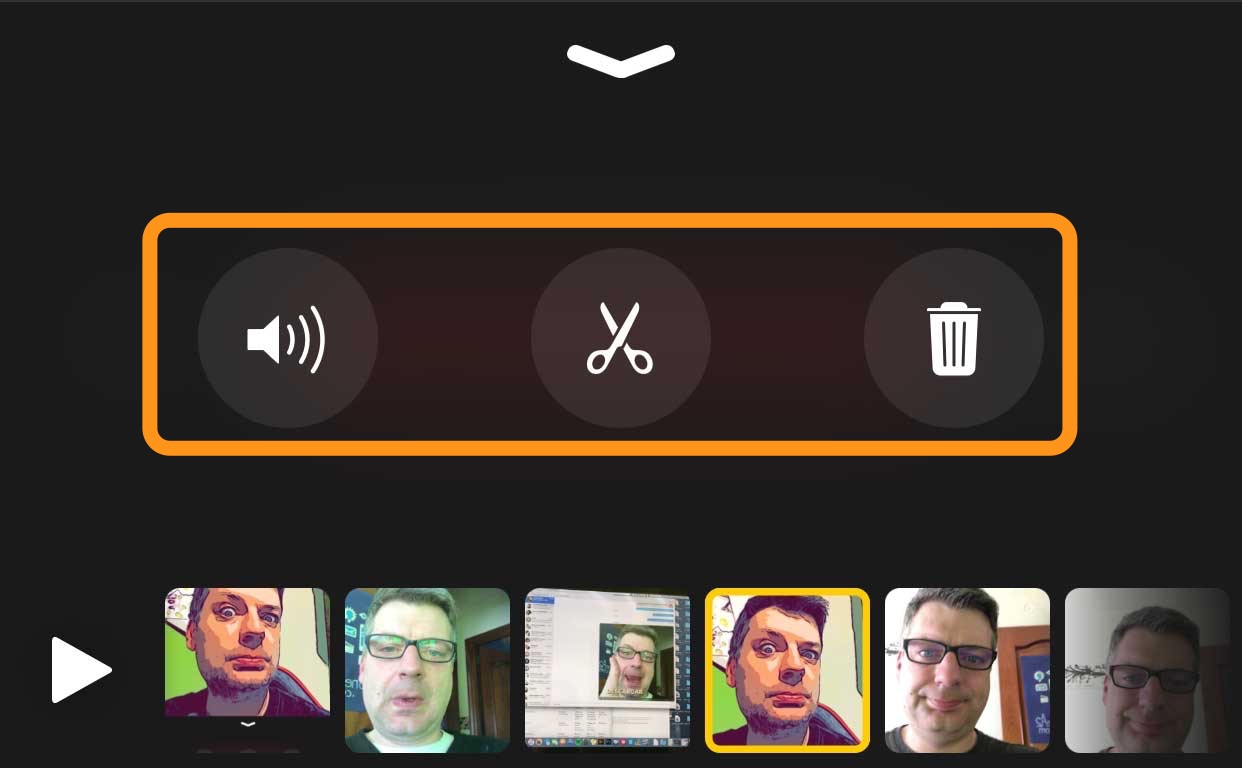
Starting from left to right these are the uses of the different buttons:
- Sound: Mute and unmute the clip.
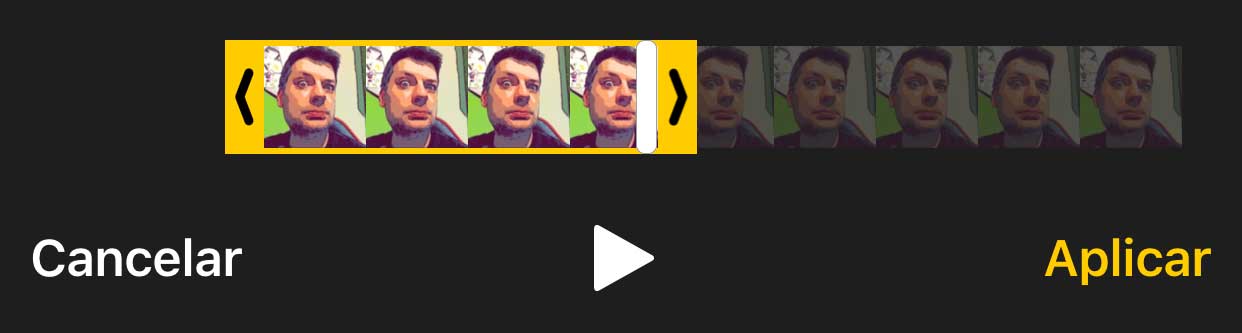
- Trim: Edit-videos-clips If you think that the clip you have made is too long and you want to have only a specific moment, this is your tool, with it you will be able to keep only what interests you.
- Eliminate: If you regret one of your clips you just have to select it and touch this button, it will be deleted forever from your Time Line.
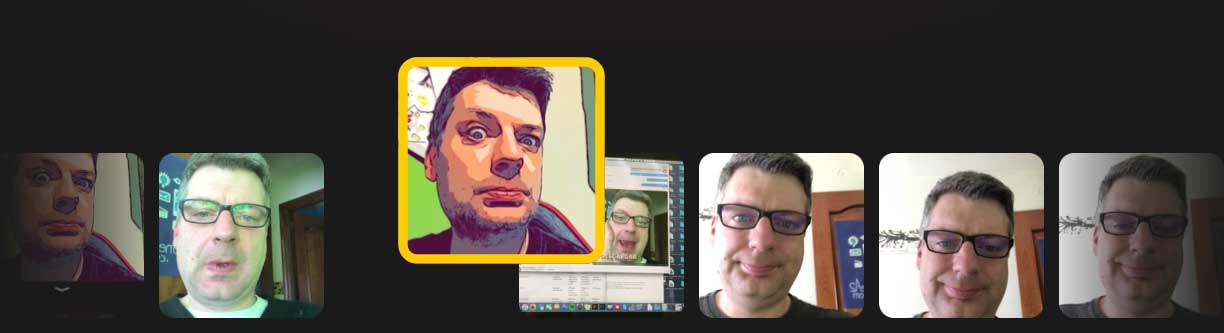
You can also reposition any Clip, you just have to hold it down for a couple of seconds and put it where you want.
In addition to these options, you can also apply effects to each clip individually, or change the ones you have already put if you have regretted it. Putting new effects or changing the ones already made is done the same as at the beginning, selecting a clip and touching any effect button (subtitles, filters or rich text, shapes and emojis).
Tricks for Clips
Now that you control all the basics you need to know about Clips to create impressive videos, let's go with the tricks. Well, more than tricks for Clips, we could call them features that are not so accessible or intuitive, but they are there, so you have to take advantage of them, don't you think?
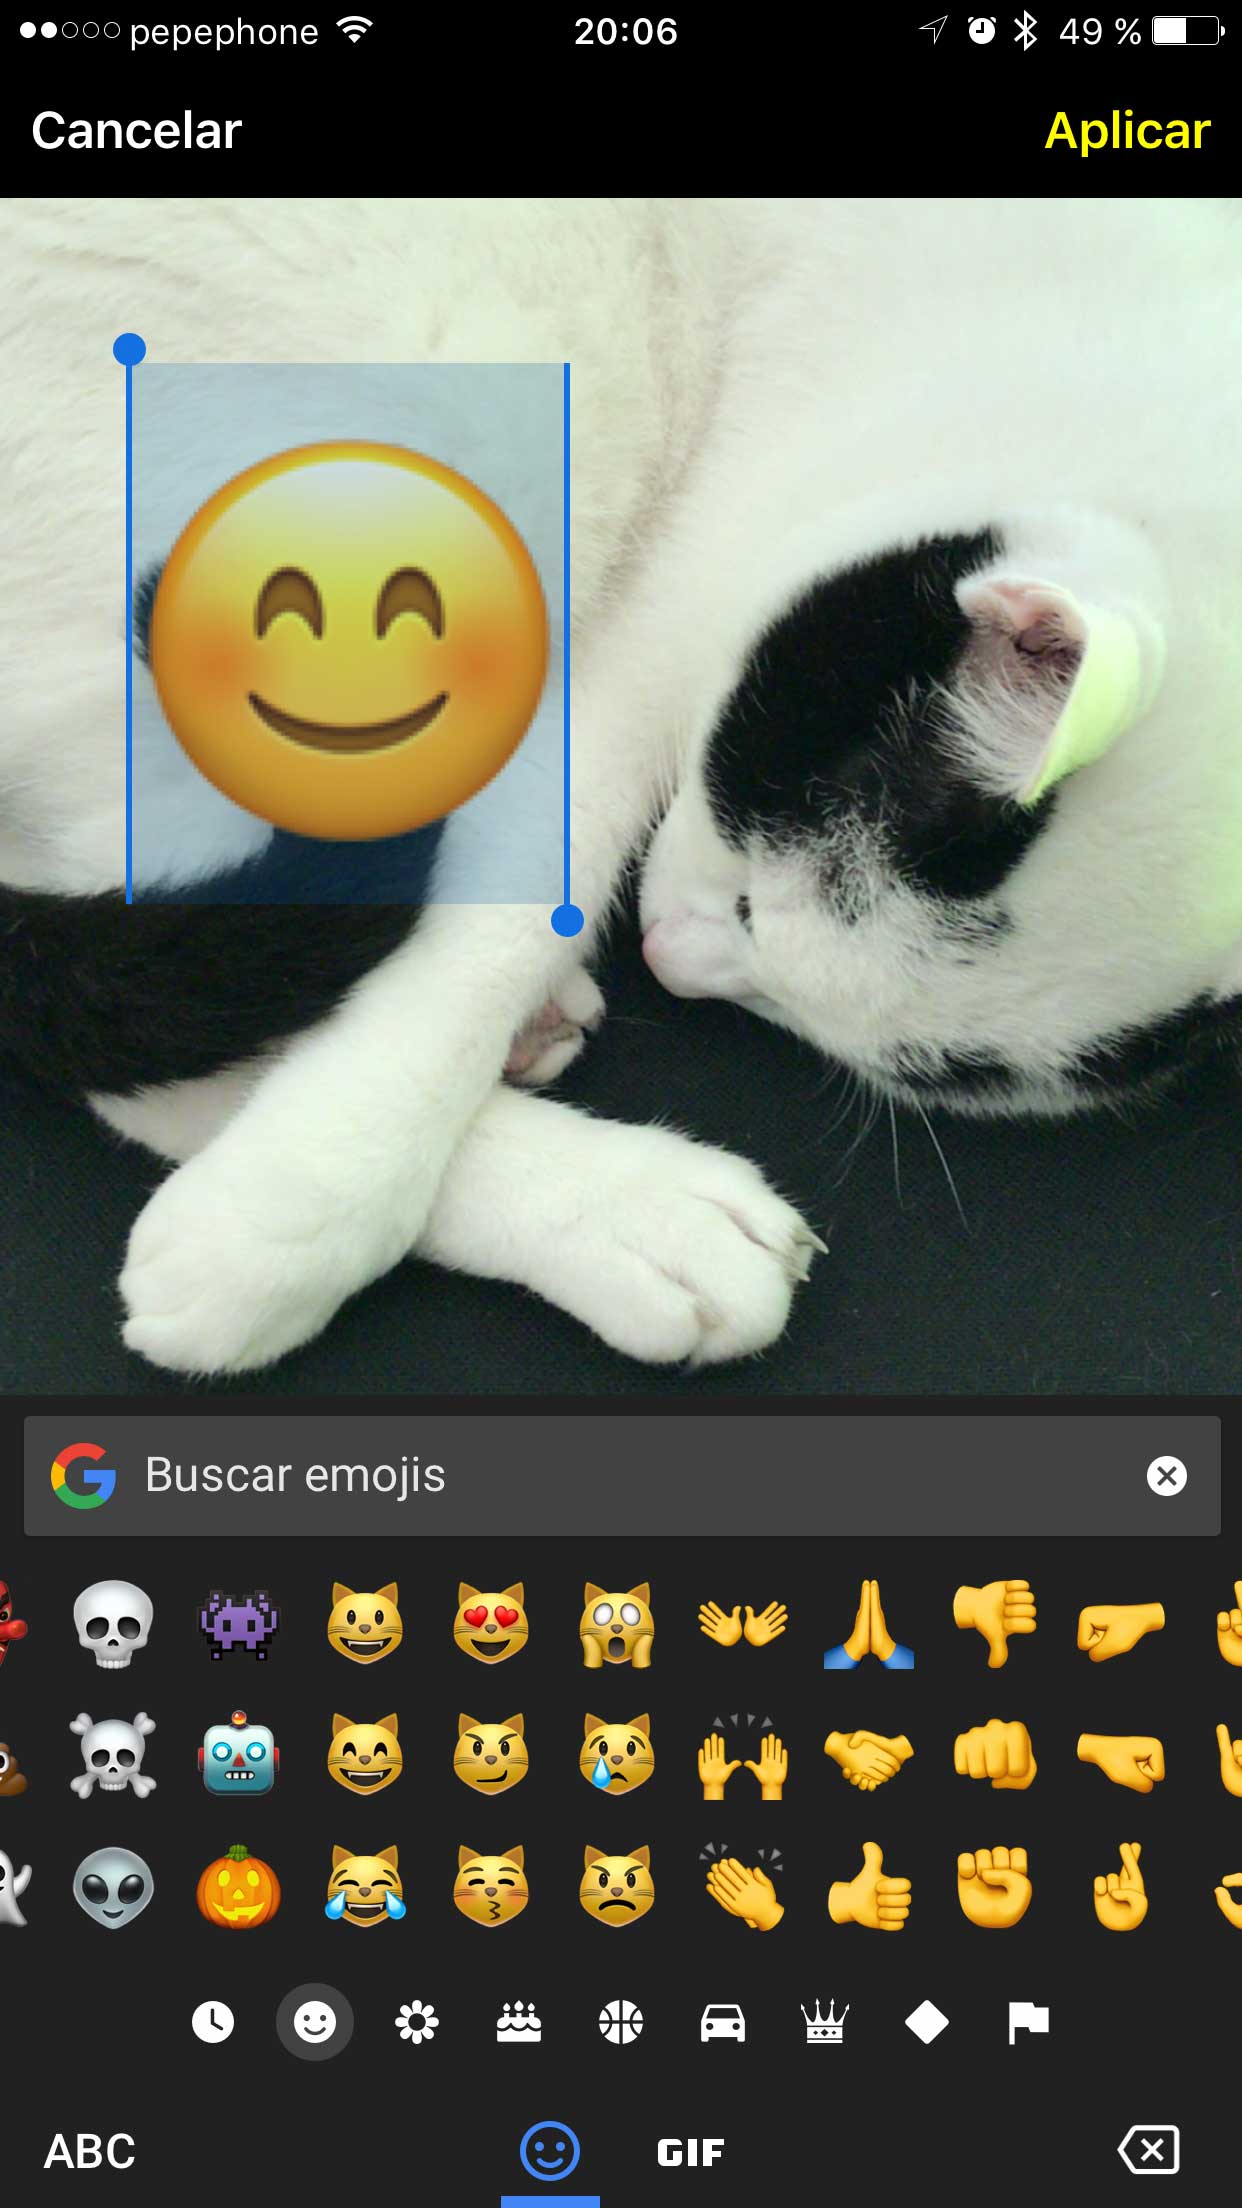
How to add the Emoji you want to Clips
When you open the Emojis section in clips for the first time, you feel a bit cold... are there only those? Where is the flamenco emoji?
Don't worry, the initial selection is quite poor, true, but in reality you can put the emoji you want, any...
To put another Emoji that is not highlighted in Clips simply choose any one, when it is added to the screen touch on it, keyboard will be released. Now you just have to launch the emoji keyboard and choose the one you want.
How to avoid having to keep pressing the red button to add Clips
Having to keep pressing the red button to record can be very annoying, especially when the video you want to add is long. However, there is a way to lock this button so you don't have to touch it all the time.
To lock the red button, you just have to put your finger on it and slide it to the left, you will see how a padlock appears, you can now release it and continue recording. To stop the video you just have to touch the red button again.

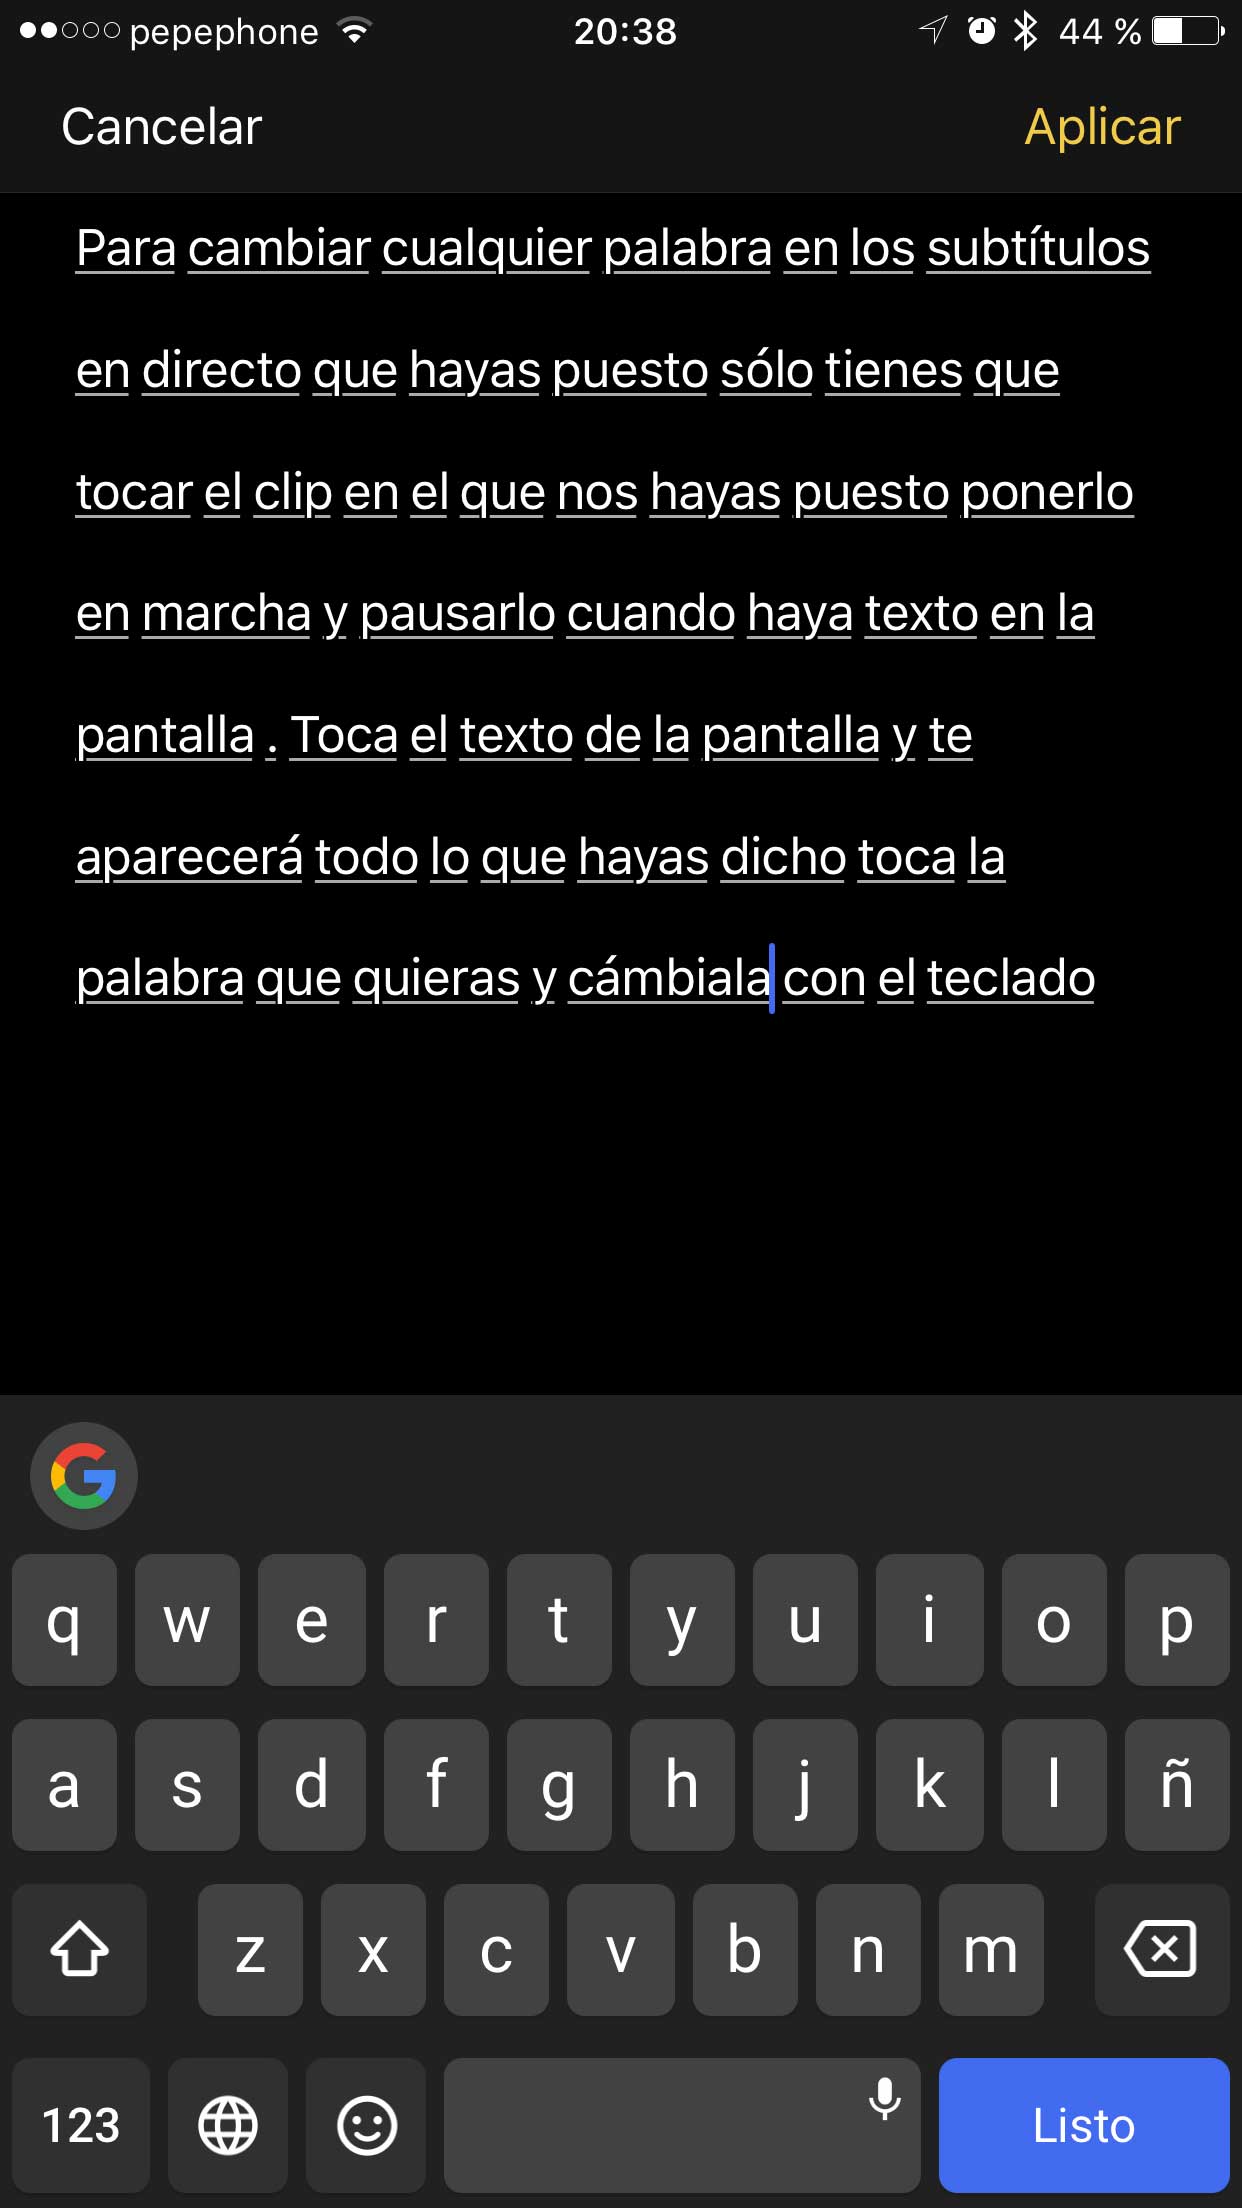
How to edit subtitle text
The live captioning feature is truly impressive, however there are times when the system doesn't properly recognize what you're saying and plays what it wants.
If you have already recorded a video with subtitles and you need to change a word that you did not understand, you simply have to touch that specific clip and start it, when text appears on the screen, pause the video and touch the text. You will see an editing screen like the one in the screenshot below, now you can correct any word.
How to Zoom Videos and Photos in Clips
You can Zoom both on the photos and videos you take directly with the Clips camera, as well as those you add from your library.
You just have to make the pinch gesture on the screen to zoom in or out. Double-tapping the screen also zooms, although much more abruptly than with the pinch gesture.
The Zoom can only be set while you are adding the Clip, once in the Time Line you will no longer be able to do so.
How to see a preview of the effect of a transition
If you want to see how a transition behaves before putting it in your video, just do Touch 3D on it, the transition will load and you will be able to see it. If it convinces you, press harder on the screen and it will be added to the Clips introduction screen.

And this is all that, for now, we can tell you about Clips, if we have forgotten something, do not hesitate to tell us in the comments to expand this article.
How about clips?